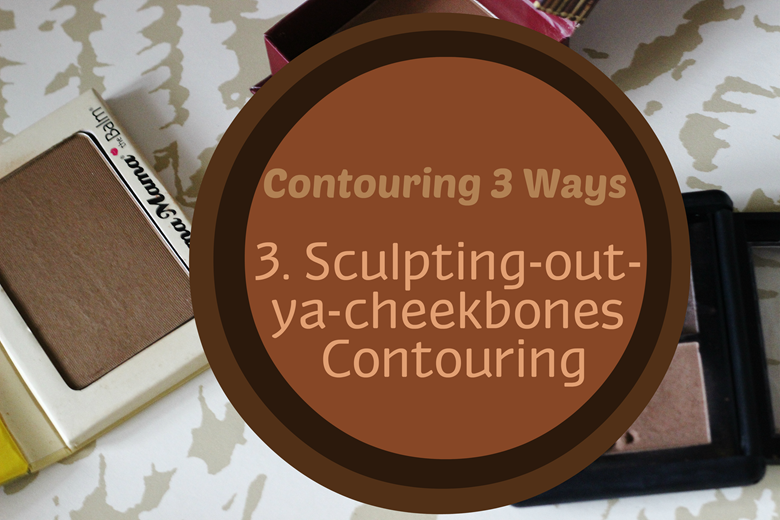
Contouring 3 Ways |Sculpting-out-ya-cheekbones Contouring

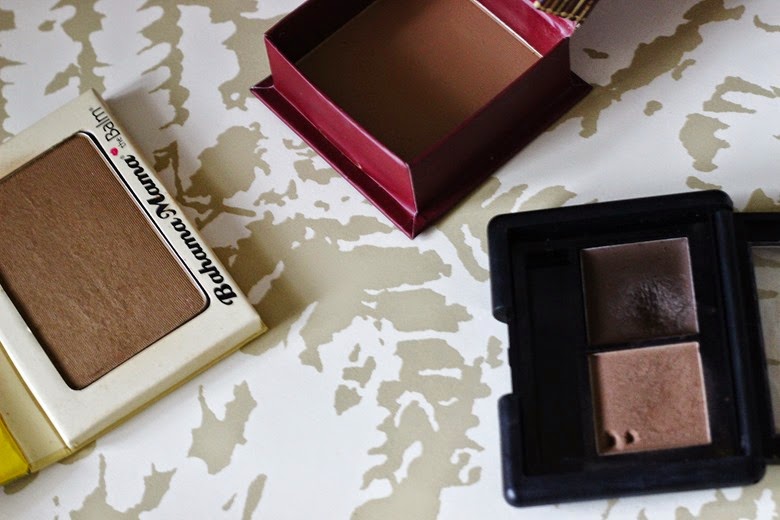
the balm bahama mama benefit hoola elf brow kit medium

Hello! I hope you are all well! I have started my second year at uni, and aside from some extra transport issues, its been a fantastic day, quite glad to be back to a having a routing and just getting educated y’know? Anyway todays post is the final part of my contouring series. I hope you’ve enjoyed them so far!
Sculpting-out-ya-cheekbones Contouring (AKA: Heavy/I’ve made a effort/KIM K)
This is your full on contour, chiselled cheekbones to perfection type of contour. My favourite way to do this for a special occasion is to actually layer up with creams and powders. So I start a liquid contour and then set it with a darker powder.

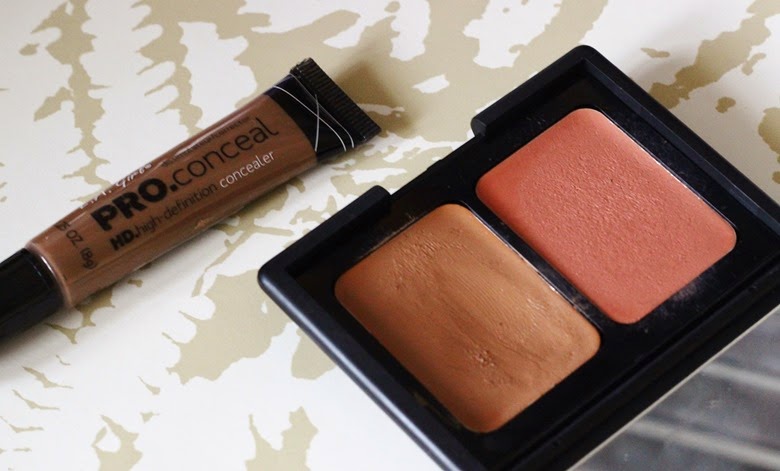
e.l.f cream contour and blush kit LA GIRLS HD Concealer

HOW:
  1. Starting with either the E.L.F Cream contour duo or the L.A Girl PRO Conceal concealer in beautiful bronze. I carefully apply my contour in the areas shown on your standard face chart. Of course every face shape is different, so it could take a little experimenting and trial and error to find the right ‘place’ to add the bronzer onto your face. Generally I feel for the bone area and apply the cream contour JUST under. I always add some cream contour to the jawline to disguise that double chin!
  2. Then I take my e.l.f small stipple duo brush and gently buff and blend the contour out a little. At this point it will still look a little crazy but it’s alright, it’s all part of the process ^_^
  3. Next taking a larger fluffy brush (95% of the time the trusty RT contour brush!) I gently tap it into a powder which isn’t a warm orange tone and go directly over the contour. Because the powder I use for a stronger contour is darker and more cool toned I never go heavy handed with this, again being gentle and taking your time add the powder. I always start at the top of the cheekbone and concentrate the most amount of contour powder at that point, blending downwards.
  4. I then proceed to add blusher just over that contour line and blend the blush out upwards slightly. This adds colour to the cheeks, makes your face look more alive and slightly lessens the intensity of the contour. To me this makes the most flawless cheek and really gives the illusions that I don’t have chubby cheeks, instead I have cheekbones that could potentially slay. (am I getting carried away? ok I'm sorry but strong cheekbones change a girl!)


Nose Contouring?
With the nose its a tough one, honestly do not ever nose contour le nose in a hurry unless you’ve been doing it with plenty of practise, because nose contouring when gone wrong looks a lot worse than bad cheek contouring._. The best advice I can give it to literally youtube nose contouring and spend a decent amount of time observing how people do contour their noses because lets be honest, whilst there are probably 5 ‘face-shapes’ out there there are probably 10x the amount of different nose shapes and sizes.


I use and recommend:
the balm bahama mama benefit hoola elf brow kit medium
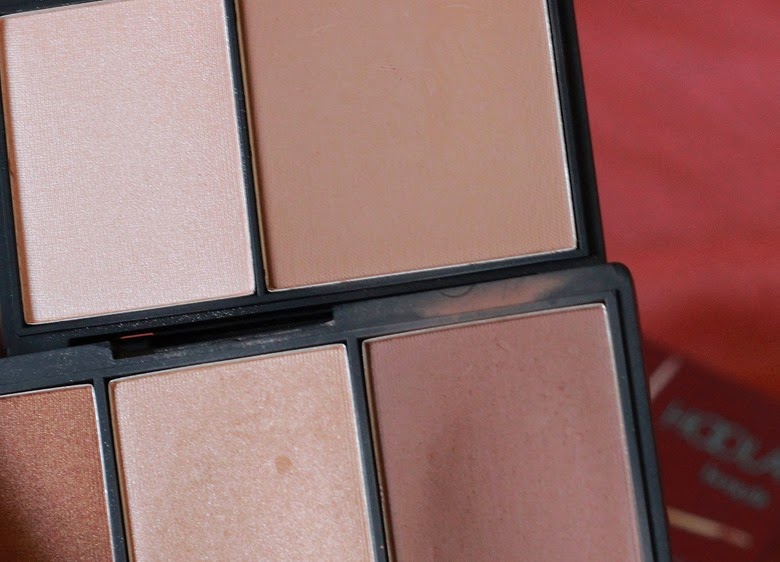
The Balm Bahama Mama | £13.50: An amazing matte shade which is a cross between a dark brown and grey. It’s the first bronzer that I bought which has a real sculpting effect. It can look a little dark but applied precisely and blended out well and you can really achieve a fantastic shadow effect.
E.L.F Brow Kit in Medium | £3.95: You must be pretty confused if you haven’t read THIS post, but I’m sure you get the idea! This cool toned brown is literally the most wonderful sculpting contour I have ever discovered. It’s a tad lighter than Bahama Mama and so gives a shaped appearance with a little less effort.
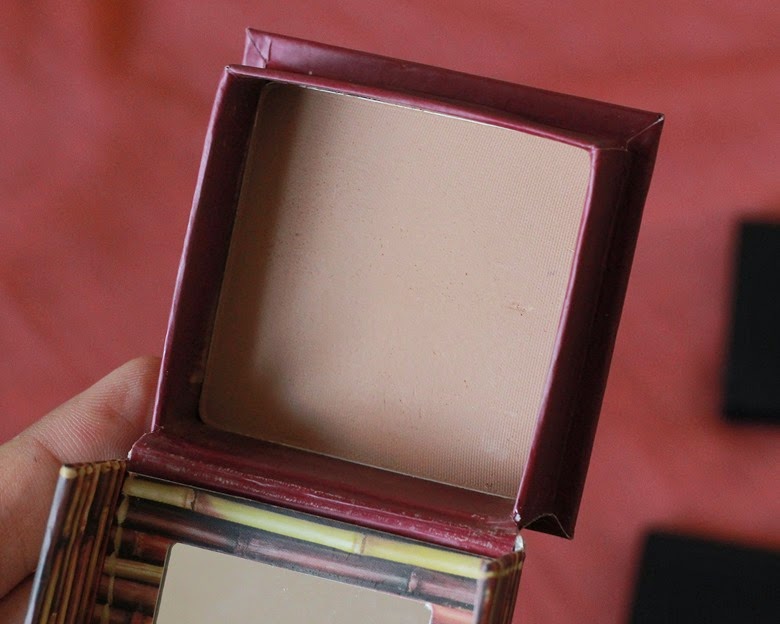
Benefit Hoola Bronzer | £23.50: This is raved by beauty lovers all the time,  and there’s a great reason for it. It suits fair to medium skintones and can be built up with ease. I find that a little bit sculpts but I can also achieve a warmth from this matte shade too.

All three of these are wonderful sculpting powders and I love having them in my collection for when I want a stronger contour.

Which products do you turn to when you want a strong contour? I’d love to know!

Thanks for reading!

Contouring 3 Ways |Sculpting-out-ya-cheekbones Contouring

the balm bahama mama benefit hoola elf brow kit medium

Hello! I hope you are all well! I have started my second year at uni, and aside from some extra transport issues, its been a fantastic day, quite glad to be back to a having a routing and just getting educated y’know? Anyway todays post is the final part of my contouring series. I hope you’ve enjoyed them so far!

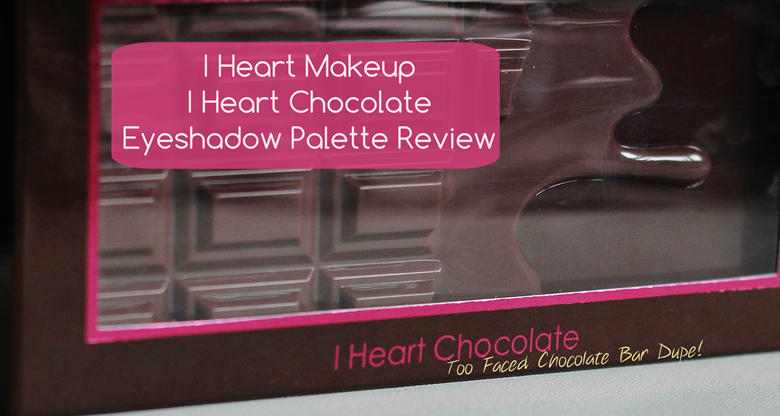
Review | I heart Chocolate Makeup Revolution Eyeshadow Palette


makeup revolution i heart chocolate eyeshadow palette too faced chcolate bar review dupe swatch

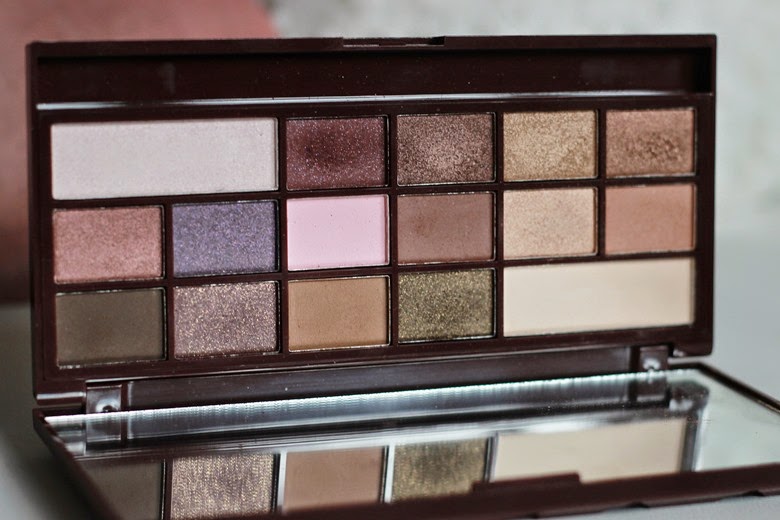
Makeup Revolution is EVERYWHERE right now, and there’s a great reason why most bloggers can’t stop raving about the brand. It’s the new budget makeup option which gives other drugstore brands a real run for their money. Over the past few months I’ve bought a bunch of their products, and today I will be reviewing the I <3 Chocolate eyeshadow palette. Its the only palette I’ve used for the last three weeks, I wouldn’t be exaggerating by saying I’ve fallen head over heels for this.

makeup revolution i heart chocolate eyeshadow palette too faced chcolate bar review dupe swatch

I Red heart Chocolate Makeup Revolution Eyeshadow Palette | £8

So lets start with the obvious - this is a clear dupe for the Too Faced Chocolate Bar Palette which is a hefty £45. The makeup revolution palette is only £8, so it certainly is the more affordable and justifiable in comparison, but is it worth buying?

makeup revolution i heart chocolate eyeshadow palette too faced chcolate bar review dupe swatch

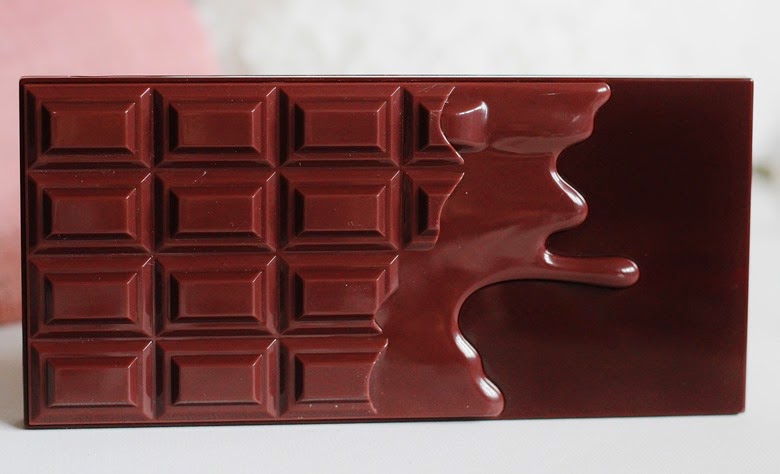
The packaging is SO adorable, in the shape of a chocolate bar with melted parts and all, I actually prefer this to the original! I really appreciate the effort that’s gone into the packaging too, as this as a budget brand, it shows that despite the low price there is still room for creativity and uniqueness. Inside there is a huge mirror which is always a plus with eyeshadow palettes and travelling - who else hates doing their eye-makeup holding a separate mirror?!

makeup revolution i heart chocolate eyeshadow palette too faced chcolate bar review dupe swatch

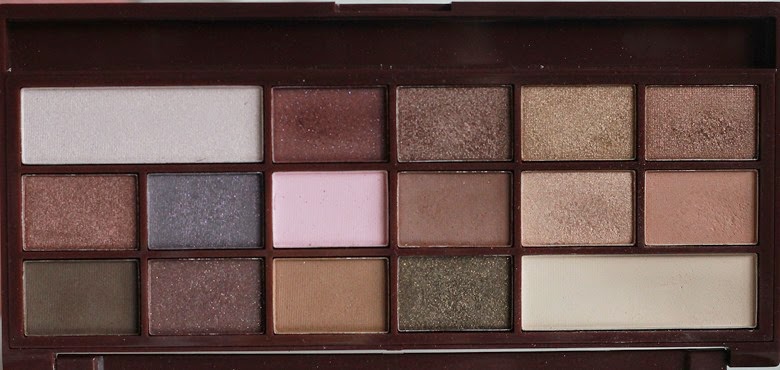
The palette contains 16 shades, 6 which are matte, 3 satin with golden shimmers/small glitter and 7 satin shades. The palette as a whole is very much neutral and I am now in the position to say that it is my FAVOURITE drugstore/budget eyeshadow palette of all time. Yes I prefer this to Sleek’s Au Natural and MUA’s Undressed which is HUGE because that one was my 2013 ultimate favourite palette! Oh yeah, this guy is in the top spot, now let me stop rambling and explain why!

I like to apply a bit of eyeshadow whenever I wear makeup (provided I have time of course). This is because I do have dark circles, and I normally conceal my eyelids anyways, which always tends to crease if I don’t had powder. Therefore in an eyeshadow palette I appreciate a ivory/cream matte base shade, light brow type of crease shade, satin gold of some kind and a matte darker brown to add definition. Any other shades are a bonus for when I want to switch it up a little, but when a palette has these 4 I am a very happy girl. The moment I opened and swatched a few of the colours I literally did a happy dance (more like a head and shoulder shuffle but you get the picture!).

makeup revolution i heart chocolate eyeshadow palette too faced chcolate bar review dupe swatch

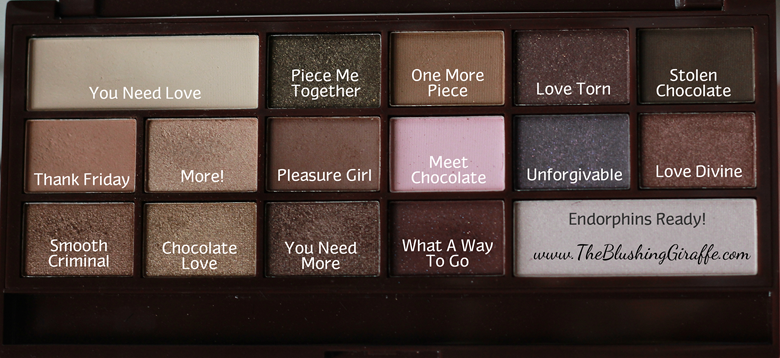
As you can see they have named each shade and I love the interesting quirky and generally chocolate related names that they picked!

My everyday  eye makeup with this palette is as follows:

You Need Love (it is a large matte ivory shade, PERFECT for all over the lid and under the brow bone and I adore how they made this shade one of the largest as its certainly the one I’ll hit pan on first!) all over my eyelid, and concentrating more on the inner corner.

Then I take a large fluffy brush and go crazy with Thank Friday which is the most wonderful crease shade for any eye look, its a dusty orange/brown and pulls together all other shades on the lid, whilst adding a little warmth and definition.

I then take a tiny bit of You Need More or Smooth Criminal on a small shader brush and I pack that on in the outer half of the eyelids, being sure to blend it all together with a fluffy brush! More and Chocolate Love are both lovely for adding to the middle of the eyelid or even using the as inner corner highlights and Pleasure Girl is perfect for adding under the lower lashline for a tad more definition.

makeup revolution i heart chocolate eyeshadow palette too faced chcolate bar review dupe swatch

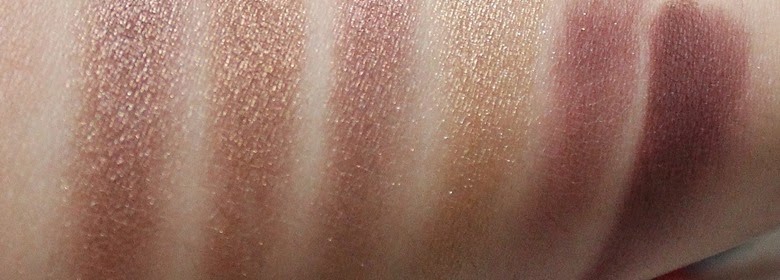
Swatches of a few random shades, one swipe each and no primer!

In general the matte shades are a little chalky which can be expected of a cheaper shadow, however they’re still nicely pigmented when applied on top of a base. The shimmer shadows are absolutely beautiful, so creamy and very pigmented (hence the happy dance mentioned earlier). The darker shades with the gold flecks have quite a bit of fall out (I’ll never make the mistake to do my base makeup before applying darker shadows!). However they are still wonderfully pigmented!

If I were to recommend a newbie or a drugstore makeup snob one palette, THIS would be it! Thank-you Makeup Revolution, you’ve done a fantastic job once again!


Final Verdict:

Product rating: 8.5

Pros: The best range of colours in a neutral palette! Each eyeshadow is pigmented, the satin ones in particular. The packaging!! The large mirror, the mix of lights and darks, the way the matte ivory shade is the largest making it very useful and I do use that shade every single day!

Cons: After around 7 hours the colours look a little faded. Tested on top of concealer only. I’m yet to invest in a high-end primer.

Repurchase? 100% yes! This has knocked the MUA ones out of the picture, and the vast variety of palettes MUR offer is astounding!

Have you tried any of these amazing palettes? ^_^

Thanks for reading!

 Follow Via Bloglovin' | Tweet Me | Follow on Instagram | Like The Blushing Giraffe on Facebook

Review | I heart Chocolate Makeup Revolution Eyeshadow Palette


makeup revolution i heart chocolate eyeshadow palette too faced chcolate bar review dupe swatch

Makeup Revolution is EVERYWHERE right now, and there’s a great reason why most bloggers can’t stop raving about the brand. It’s the new budget makeup option which gives other drugstore brands a real run for their money. Over the past few months I’ve bought a bunch of their products, and today I will be reviewing the I <3 Chocolate eyeshadow palette. Its the only palette I’ve used for the last three weeks, I wouldn’t be exaggerating by saying I’ve fallen head over heels for this.

Contouring 3 ways | 2. The Light/Natural Contour

contouring 3 ways the light natural contour

Hello ladies! Today I am going to be sharing the second part of 3 in my little contouring series. Please remember I am not an MUA, Pro or specially training. I’m simply a makeup lover who has trialled and error-ed her way through YouTube tutorials and a bunch of bronzers, and now I want to share my tips and methods.

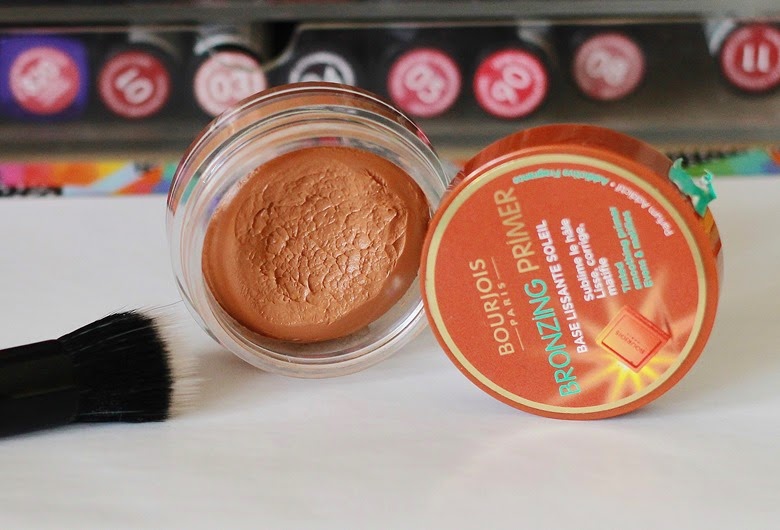
contouring 3 ways the light natural contour elf contouring blush and bronzing cream bourjois bronzing primer

2. Light and Natural Contouring

When I first started writing this up I thought about how I lightly contour and I was sure I would only be writing about cream products, but I have two methods, one that should perhaps have been in the first post (quick contouring) but anyhoo.

I like to lightly contour is when I’m going for a minimal makeup look or I just want to bronze up my skin and achieve a very natural look. I’m always amazed by how realist contouring with creams can appear and I enjoy that effortless makeup look too. I was always a little unsure about cream products, perhaps because I didn’t know the best way to apply them but I’m pleased to say I love me some cream bronzer!

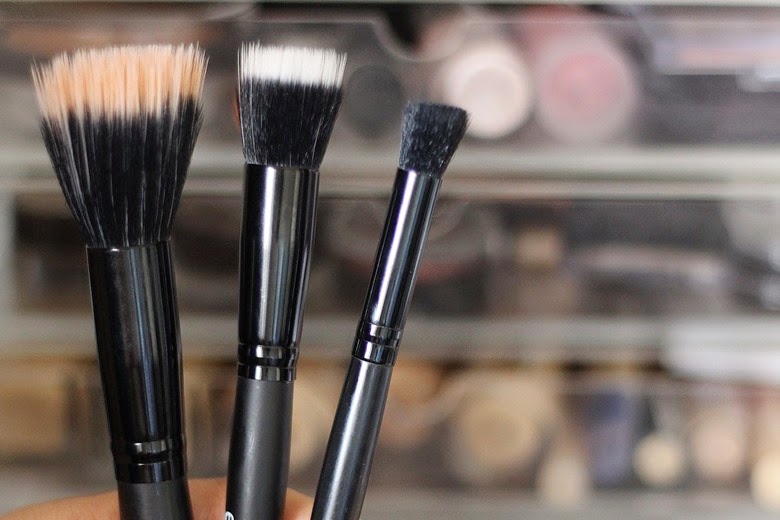
e.l.f stippling brush e.l.f small stipple brush e.l.f angled contour brush

How:

  • I like using my fingers, the E.L.F angled contour brush or the E.L.F small stippling brush 
  • I dab on the cream bronzer along my cheekbones, the temples of my forehead and a little along my jawline. Don’t be worried if it looks too harsh against your skintone because cream products blend in a lot easier than powder and with the right brush or sponge you can blend it to the exact intensity you’d prefer.
  • I then take a larger stippling brush (the e.l.f one) and blend out the cream bronzer to my hearts content! Sometime I will blend the cream bronzer in a wider area around my cheek giving it that sunkissed look and then go in again with a second layer of the cream product, concentrating it on where a shadow would fall (the hollows of the cheekbones) and adding a bit more of a sculpt to this still very natural looking contour.

The best thing about using a cream rather than a powder is how natural the warmth on the face looks. Powders can look very harsh and obvious, but a cream product blended in well with a duo-fibre brush or a damp sponge gives a stunning warmth to the face, and if you use a darker shade that leans to the cooler spectrum, it can add definition perfectly.


contouring 3 ways the light natural contour elf contouring blush and bronzing cream bourjois bronzing primer

I USE AND RECOMMEND:

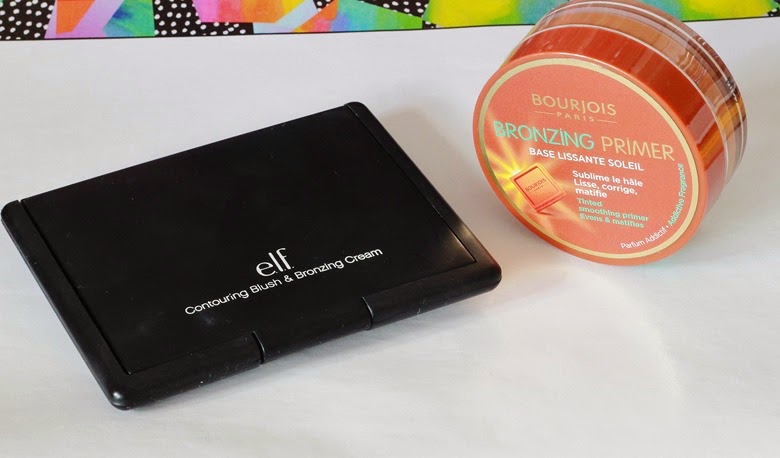
  • Bourjois Bronzing Primer (£9.99): Firstly I should comment on the texture of this, it’s like a moose and quite funny to swatch because when you put your finger in the pot all the product wobbles haha. Colour wise one layer is a little too light for me, but two layers is the perfect soft contour as it dries to a medium subtle warm brown tone. Like I stated earlier I like to apply this with my fingers first in my cheekbone area and then go over my cheekbones with the E.L.F Angled Contour Brush which is the PERFECT size to trace out and define cheekbones!

contouring 3 ways the light natural contour elf contouring blush and bronzing cream bourjois bronzing primer

The texture of this and the beautiful colour still makes the whole effect look very natural but it does make a lot of difference. I especially love using this product when I’m using a lighter base like my bourjois CC cream. This would be great for fair to light/medium skintones . I’d recommend google image searching this as you’ll be able to see how people use it add that natural warmth.


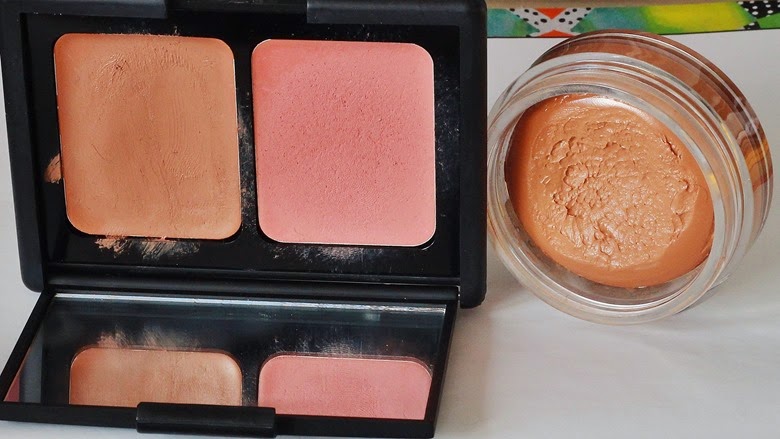
  • E.L.F Contouring Blush & Bronzing Cream - St. Lucia (£3.95) : I ADORE this cream duo! The contour shade is quite dark when first applied but it dries to a slightly darker shade than the Bourjois bronzing primer. This one would be great for NC35+ but as I said it really can be blended in duo to its consistency. I love how it adds a wonderfully healthy warmth to the face as well as subtly contouring, and again I always use this with the E.L.F Angled Contour Bronzer to apply this as it is darker then the above and so needs a little more precision. I also love the blush with this, they compliment each other perfectly and I’d highly recommend anyone with a medium/olive skintone to pick this up next time they have an awesome sale, for less than £2 this is a total steal ^_^

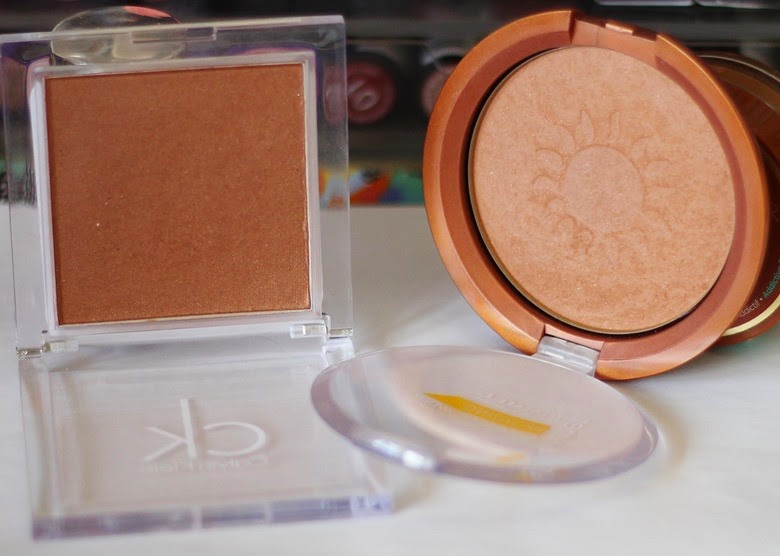
calvin klein bronzer rimmel compact bronzer medium mattea

The Second Way:

So the above is the main way I achieve a natural contour, however sometimes when I’m feeling very lazy or I’m in a rush but I want a little bit of definition I grab my Real Techniques Powder Brush and apply the Calvin Klein Bronzer in Sun Bathe  (available HERE) which does have some shimmer but remember dusted lightly or the Rimmel Bronzing Compact Powder Medium Matte. Both of these are darker bronzers and I firstly dust one layer all over the cheekbones, jawline, forehead and a little on my nose. This gives that warmth and healthy appearance. I then concentrate the second sweep directly along the cheekbones which adds a little definition without a precise line along the cheek.

Those are my way to create a ‘natural contour’ if those two words can even be in a sentence at the same time! These ways are perfect for girls who want a very subtle but still pulled together look, who dislike that Kim K obvious structure and would rather have some warmth but not completely lose the definition! The cream method isn’t the quickest at first but once you get used to it, the process becomes effortless and the darker bronzer is a lazy girl’s best-friend! Tip: Stay far AWAY from orange-toned bronzers when using this method, ain’t nobody wanting to look like a cheese puff ._.


Stay tuned for my final contouring post - the full on contour coming soon! And if you missed my guide to how I contour quickly/day-to-day have a read right here. I hope this was somewhat helpful!

Thanks for reading!

 Follow Via Bloglovin' | Tweet Me | Follow on Instagram | Like The Blushing Giraffe on Facebook

Contouring 3 ways | 2. The Light/Natural Contour

contouring 3 ways the light natural contour

Hello ladies! Today I am going to be sharing the second part of 3 in my little contouring series. Please remember I am not an MUA, Pro or specially training. I’m simply a makeup lover who has trialled and error-ed her way through YouTube tutorials and a bunch of bronzers, and now I want to share my tips and methods.

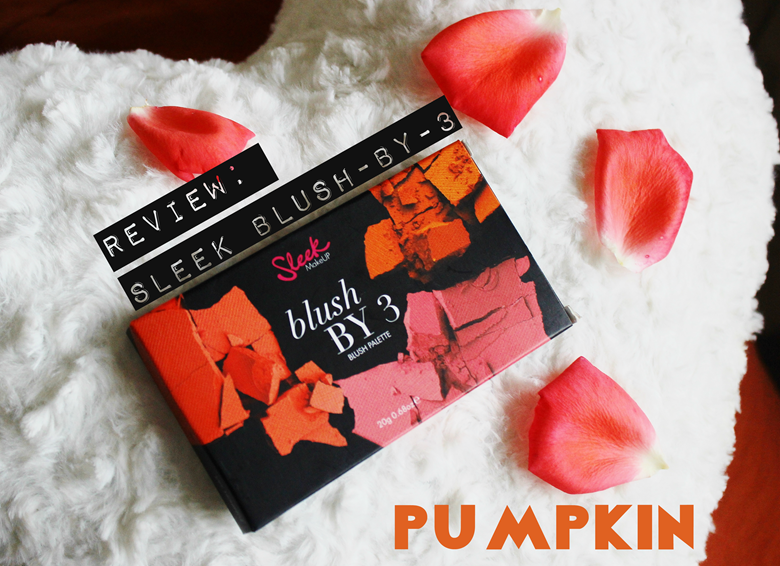
Review | Sleek Blush by 3 in Pumpkin

review swatch sleek blush by 3 pumpkin
Hi ladies! Today I am reviewing another one of Sleek’s blush-by-3’s in ‘Pumpkin’.
IMG_9705

Sleek are famous for their blushers, i’m pretty sure their cheek products and their eyeshadows are the first thing that pop’s to most people’s minds. As a brand they have just gone from strength to strength through the years. I think price point their blush-by-3s are phenomenal! A tenner for one, which means each shade costs £3.33 - insane value for money. I love that Sleek started as a drugstore (actually marketplace) brand to cater for women of colour, and lets start by saying that this PUMPKIN blush by three is a must for women of NC40+.

IMG_9728

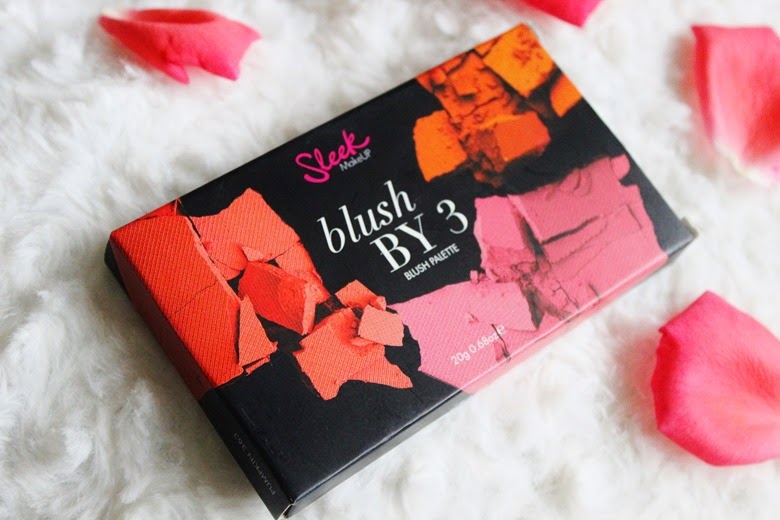
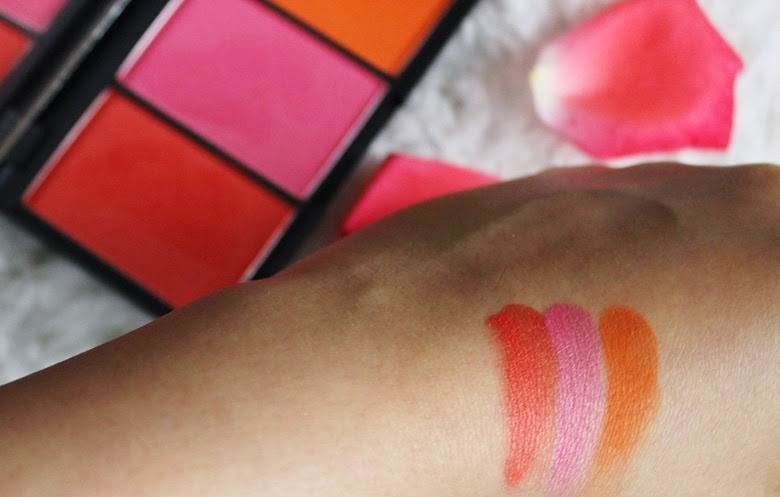
This trio has a matte, satin and slight shimmer blush and all three colours are completely different. The bright and loud and frankly unique colours really intrigued me, you would probably find it very hard to find that orange or red shade from any other drugstore brand! Although it’s not a fool
-proof blush palette in the slightest, it’s a really fun one to have in your collection.

IMG_9751
The packaging is your standard black sleek rectangle. I love that it has a full sized mirror inside it, very handy for when travelling (as is the range of colours!). You also get a decent 6.66g of each blush and trust me this palette in particular will last you a looooong while, you have no worries there! If I’m honest I would have preferred to have something on the outer packaging to distinguish this trio from the others, but since there is non I have decided to keep it in it’s packaging when it’s chilling out in my muji, and not in my current ‘rota’.
IMG_9739
However I personally wouldn’t recommend this for very fair skintones who are newbies to blush! I am of a medium skintone myself and I found this trio was pretty challenging to work with. The bright bold colours come on very strong so I was glad to have two full weeks to really experiment with different brushes and different techniques. I have found that a gentle brush against the blush and then dabbing it onto my arm first to sheer the pigmentation, works best. I thought I had become pretty good with using a light hand...needless to say after resembling a clown I was proven wrong! I’m going to go through each shade; (I really do like how they have named each shade!)
P.PIE-SQUASH-LANTERN-SLEEK-BLUSH-BY-3-PUMPKIN
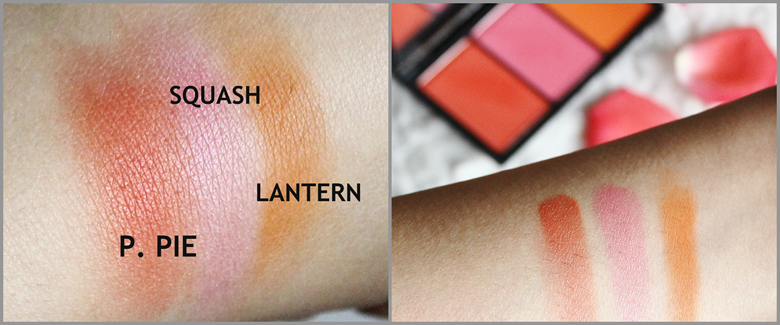
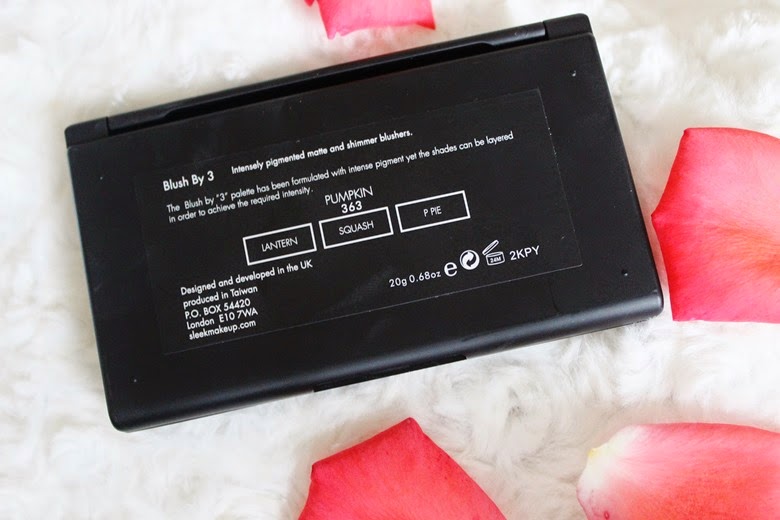
P.PIE: This red shade is my favourite of the trio. It has a slight sheen to it which looks beautiful as it catches the light and I think its a very flattering shade when worn correctly. My favourite way to apply this shade is using the Real Techniques Duo-Fibre Contour Brush. Once I have tapped it into the blush pan and dabbed it against my arm, I gently pat this directly over my contour line and blend upwards ever so slightly. It looks amazing when I have bronzed up skin, but I think it would also look stunning against fair skin-tones if used VERY sparsely. It also makes a wonderful difference to your typical pinks and peaches. It has a very subtle golden shimmer to it, when swatched on my hand you can see the little glimmers but because I apply it with such a light hand (and after the pigmentation has sheered out on the back of my hand) you can’t see the shimmer, it’s just more of a glow.
Squash: This is a shade which I would normally run a mile from, which is odd considering the two shades either side of it right? But I’ve just never enjoyed this bright pink against an olive skintone. However when sheered out it looks alright, a little like I’ve been out for a jog. I only wore this shade alone once, and then decided to add a tiny bit of the orange shade and I did prefer those two together over the pink alone. Perhaps I would prefer this if it was a matte shade? It’s just not my type of pink y’know?
Lantern: The only matte shade of the bunch, this is an orange pop of colour that without a doubt drew me to the palette. Sleek weren’t kidding by calling them ‘intense pigments’! I can picture this shade looking absolutely gorgeous on deeper skintones (in fact all three would!). Personally I love to wear lantern very lightly and then add a tiny bit of P.PIE over the top. The layering of the two colours are so unique and refreshing at the same time! I also love that this is a true matte shade ^_^
IMG_9729
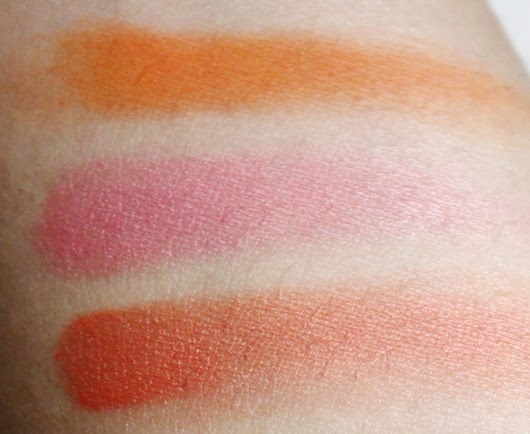
As you can see from the ends of these swatches when slightly sheered out the shades do look less intimidating than with a heavy swatch!
Also given the range of colours in this trio alone, there must be a shade from the three that would work well for just about anyone. Remember its more about the technique of applying these, and once you get the to work - they can work a treat!
However the tiny amount that I use each time I open the palette means that this is going to be in my collection for a very very very long time! You really do get your money’s value when it comes to their blushers!

All in all I think this is a beautiful transition blush palette from summer-autumn. I wouldn't reach for these shades in the winter, and they’re a little too bright for the spring but I have thoroughly enjoyed the past fortnight just forcing myself to embrace other blush colours! I would highly recommend this to those of you with deeper skintones as the shades are just phenomenal. Again for ladies of a light-medium tone complexion, tread carefully as this stuff shows little mercy!
Sidenote: I would NOT recommend grabbing any of these shades when running late for work, unless you want to spend the journey desperately rubbing at your cheeks with a stippling brush of course!
IMG_9725
Final Verdict:
Product rating: 7.5

Pros: Three extremely pigmented blushers, wide variety of colours in one palette, three different finishes, they work well layered or blended together, different from the drugstore norm, fantastic value for money, sturdy packaging, great mirror.
Cons: This isn’t a palette for beginners to blush nor is it one I would highly recommend to light skintones. You need to have a very light hand and a duo-fibre brush is recommended.
Repurchase? Let’s face it ladies, I’ll NEVER have to repurchase this because I use such a tinsy amount each time! But if it starts looking abit funky I'd have to say no because of the huge amount of blushers in my collection as it is - and the fact that I can't use this often enough to justify it.
 
Have you tried Pumpkin? What are your thoughts?


Have you read my review for the CALIFORN.I.A cream blush-by-3? Check it out here.

Thanks for reading!


Review | Sleek Blush by 3 in Pumpkin

review swatch sleek blush by 3 pumpkin
Hi ladies! Today I am reviewing another one of Sleek’s blush-by-3’s in ‘Pumpkin’.

Contouring 3 Ways | The Quick Contour

contouring-3-ways-the-quick-contour

Hello everybody! When I ask on instagram and facebook what posts you would like to read, I am often asked about contouring. I thought I would create a 3 way contouring guide, sharing the ways in which I contour and how I do it. I also have a contouring Q&A coming up....please remember I am not an MUA, this is just what works for me and what I have learnt from lots of MUA’s online ^_^

guide to contouring quickly hoola benefit bourjois duo sleek medium and light
1. Quick Contouring
This is the everyday-makeup contour. I go through phases of contouring on the regular and then not really bothering, but it can make a HUGE difference in a very subtle way which is exactly how it should be! You want a product you can apply quickly which is hard to get wrong. Nothing too orange or too dark and certainly keeping away from the crazily pigmented products!
real techniques contour brush
HOW?
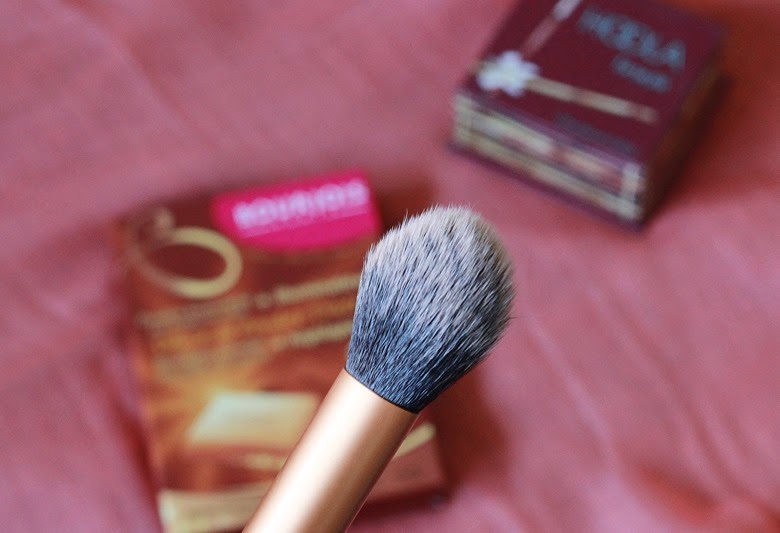
Take the RT contour brush and gently tap it against a powder bronzer. Now suck in your cheeks/pout and see your cheekbones become emphasised. Start from the top of the cheekbone (next to the middle of your ear) and gently stroke the bronzer downwards. Be sure to use short strokes with your brush and try not to go much further than the end of your eyebrow. If you have a very round face like myself, extent the contour slightly up from the middle of the ear to around where your brow stops, this will decrease the size of your face (or at least give that perception!). Remember everyday contour is not supposed to give you that Angelina Jolie look, rather its meant to add a little definition to your face. So go lightly on the cheeks and brush a little more on the temples if you have a wide forehead.
I USE & RECOMMEND THE FOLLOWING:
sleek contour kit light vs sleek face form kit medium
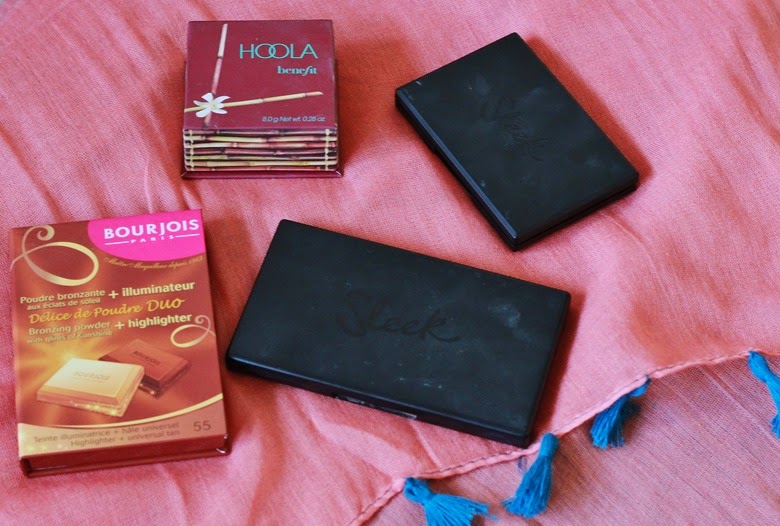
  • Sleek Contour Kit in Light (6.49) This is perfect for everyday because its a light brown shade. Great for fair-medium skintones. I only really use this when I’ve chosen a very light base (generally I go a tone up when picking a base shade but I do own a few bases my own skintone and like to use this one for those!) I like that is it subtle and so makes for a full proof contour, you won’t get those harsh streaks when swiping this on!

  • Sleek Face Form Kit in Medium (£9.99) is a deeper brown but it’s been my go-to contour shade for the past year and a half. This shade is darker so adds a little warmth without being orange (Sleek are superb at getting their contour powders right) but for anyone with skin-tone NC35-NC45 it’s the perfect option for a quick brush on the cheekbones and added definition. You can also build this up, but as with all sleek products it is more than decently pigmented, so one sweep is wonderful for that quick contour look.
bourjois duo bronzer contouring

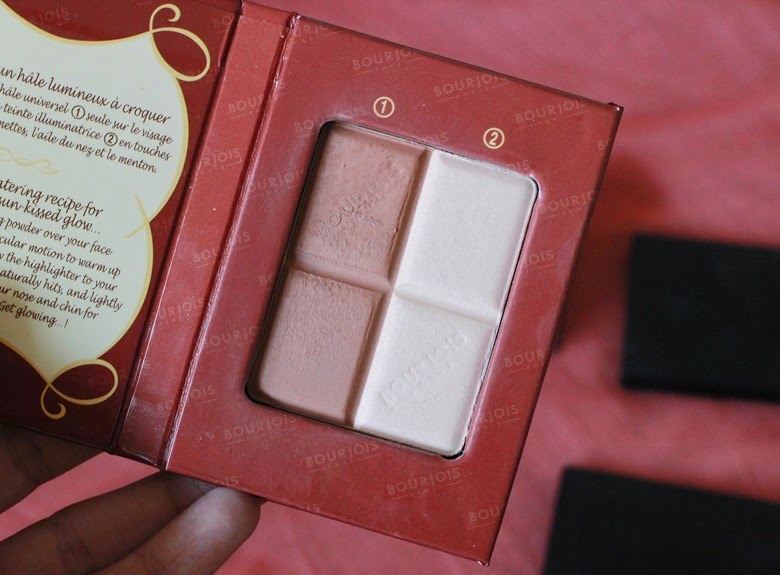
  • Bourjois Delice De Poudre Bronzing Powder: (£7.99) A new release from Bourjois; this is the bronzer that I have been using for the past two weeks and I have to say I’m super impressed. Although it appears to have some shimmer in the pan, what transfers on the cheeks is a warm shade which is dark enough to add decent definition to the cheekbones and add a slight touch of warmth. I have found this isn’t super pigmented and there is no fall out, which makes it perfect for the mornings when you’re in a rush. I won’t say too much as there is a full review coming up soon!
benefit hoola bronzer contouring
  • Benefit Hoola (£23.50) is a beautiful choice fair to medium skintones. It looks very light in the pan and when swatched, but on the skin its adds amazing definition and a little bit of warmth at the same time. I really did write this off when I first got it, but I fully understand the hype and love how well it works with fair skinned girls as well as olive toned ones. I’m not sure how Benefit did it, but it really is a bronzer that is recommended by fair skinned bloggers like HelloOctober and by warmer skintones too!

I did try and swatch these biy honestly after 15 minutes of awkwardly turning my arm around and then trying to get the focus right, I realised it was pointless. This is because aside from the sleek contour powders they all look so different on my arm compared to on my face! So I’ll try and do some #MOTDs with these instead over the coming weeks on Instagram. That’ll give you a more accurate idea of how the bronzers look.

I hope you found my quick way of contouring helpful, it’s certainly nothing revolutionary but each of these powders work fantastically on a daily basis and when I’m in a rush. My top tip for quick contouring is to still have a light hand and spend at least 30 seconds blending in each cheek because two harsh lines down the sides of one’s face is never a good look.

Remember contouring is not the same as bronzing, the first is to add definition and the second to add warmth. Although sometimes you might get away with bronzing the ‘3’ shape on your face and adding definition as well as warmth, it all depends on the shade and your skintone! If you’re interested in reading some reviews on budget bronzers click here.


Thanks for reading!
Contouring 3 Ways | The Quick Contour

contouring-3-ways-the-quick-contour

Hello everybody! When I ask on instagram and facebook what posts you would like to read, I am often asked about contouring. I thought I would create a 3 way contouring guide, sharing the ways in which I contour and how I do it. I also have a contouring Q&A coming up....please remember I am not an MUA, this is just what works for me and what I have learnt from lots of MUA’s online ^_^

guide to contouring quickly hoola benefit bourjois duo sleek medium and light
1. Quick Contouring
This is the everyday-makeup contour. I go through phases of contouring on the regular and then not really bothering, but it can make a HUGE difference in a very subtle way which is exactly how it should be! You want a product you can apply quickly which is hard to get wrong. Nothing too orange or too dark and certainly keeping away from the crazily pigmented products!

September Beauty Haul (Feelunique &amp; Soap and Glory)

september beauty hall feelunique soap and glory

As summer is ending I have been getting spendy. Well there’s less than two weeks till I’m back to being a full-time student and we all know how student budgeting works don’t we? My money book is back on my shelf and I will NOT be buying anything else beauty related till xmas sales. She says firmly to herself. Anyways on to the things I did pick up.

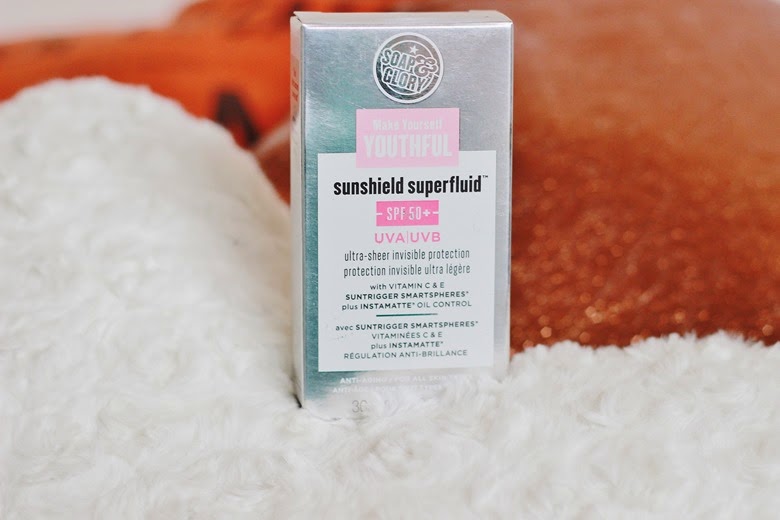
Soap and Glory Sunshield superfluid SPF 50+

Soap and Glory Sunshield superfluid SPF 50+  - £15

There is currently an offer across S&G, buy one get another half price so I thought I would pick up a few things from the skincare and body range as I have enough makeup from them at present! This sunscreen has received great reviews, and the face that is it lightweight AND SPF 50 speaks clears for itself. I am completely guilty for being irresponsible when it comes to sun protection. Maybe it’s the mostly-miserable weather we get here in England but that’s not an excuse, and sun damage can still occur. So I’m hoping this is the solution, and I’m glad I’m not forking out stupid amounts of money for a high end version which essentially does the same thing. (I mean you’re not gonna get different shades of spf!).

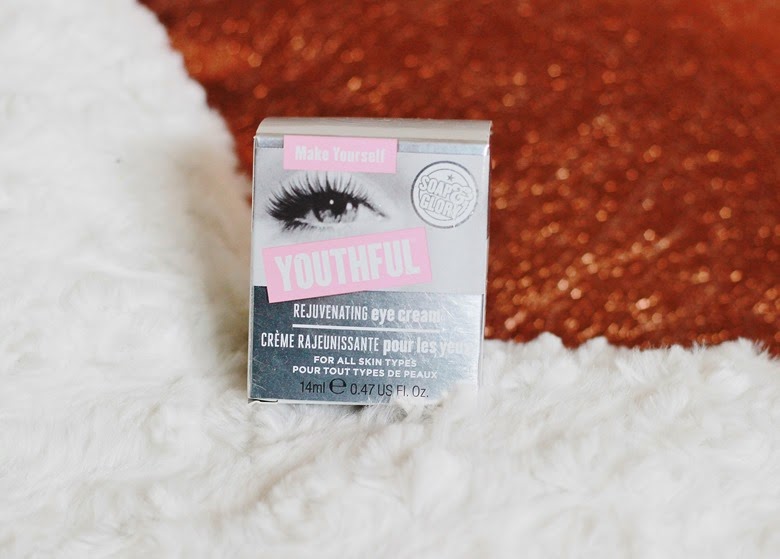
Soap and Glory Rejuvenating Eye Cream

Soap and Glory Rejuvenating Eye Cream - £14

I bought this eye-cream kinda on a whim. I mean lets be honest eyecreams are a tough one because 98% of the time you don’t seem to see a great deal of difference aside from hydration. What I have noticed recently however are fine lines under my eyes and concealer is creasing a LOT because I a forced to wear heavy duty due to the dark circles. I’m not too worried about these fine lines but after hearing good things about this little pot I’m hoping it CAN do something about them. I’ve also read rave reviews saying this did improve the appearance of dark circles so I will report back in a few weeks.


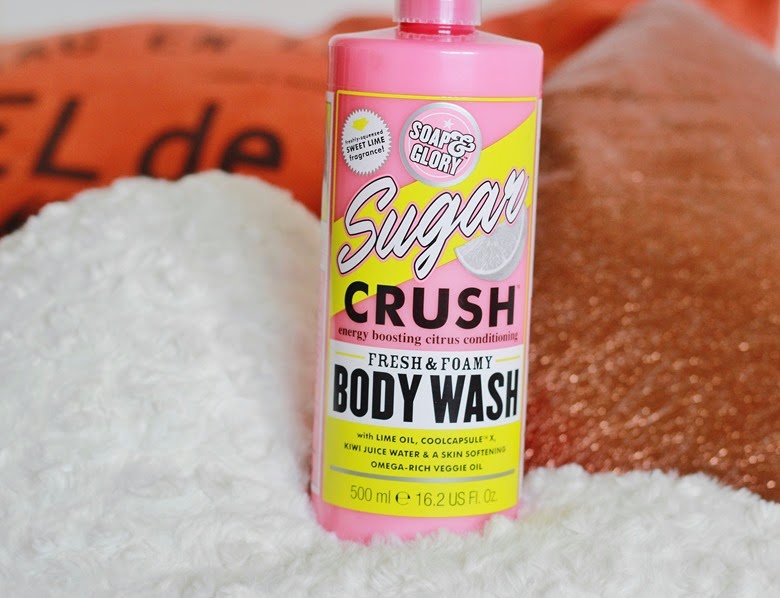
Soap and Glory Sugar Crush Body Wash

Soap and Glory Sugar Crush Body Wash - £6.50

After finishing the Clean On Me body wash and going 1 week with using a standard bar of soap I knew something had to be done. It’s funny because as I was using my first bottle of the S&G body wash I didn’t think anything of it. But the moment it had ran out I realised I missed the lovely fragrance and how the scent lingers after the shower too. Those who know me well know that my nostrils fail me at the best of times but I could always smell a faint lovely smell after the shower and I really missed it! This time I decided to go for a different body wash from their range, and the reviews said this smells like LIME CHEESECAKE?? So yup, I was in.


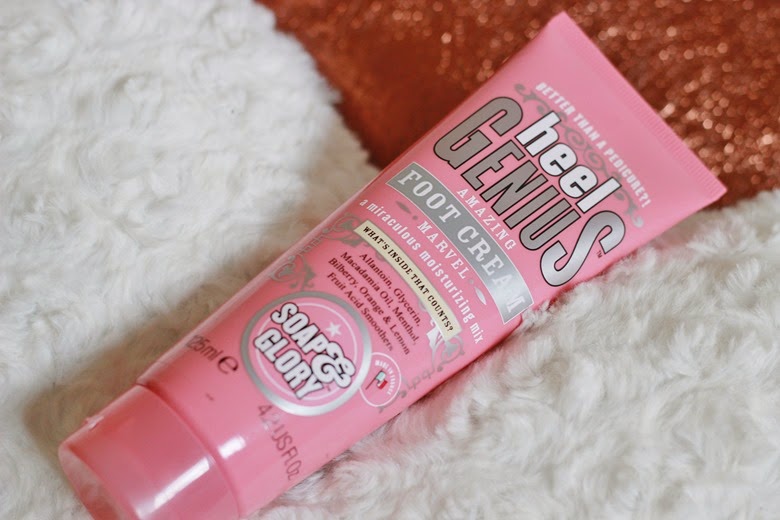
Soap and Glory Heel Genius

Soap and Glory Heel Genius - £5.50

I love the hand food and keep the large pump version on my desk, using it whenever my hands are feeling a little dry. Recently I’ve noticed my feet could do with a little TLC and because my current hand cream and body cream are from S&G this was my first thought. I love everything about this brand, from their quirky packaging to the girly scents. They recommend using this one with cotton socks overnight and I’m eager to see how well it works.


Moving on to FeelUnique.com

Since becoming an ethical beauty blogger and no longer purchasing products from brands that fund the merciless killing of Palestinian Children and women, I have really enjoyed shopping and exploring brands that do the exact opposite. FeelUnique is like an extraordinary beauty counter all on one site with beauty experts online and over 18,500 products!

The Vintage Cosmetic Company Make-up Bag

The Vintage Cosmetic Company Make-up Bag - £16.50

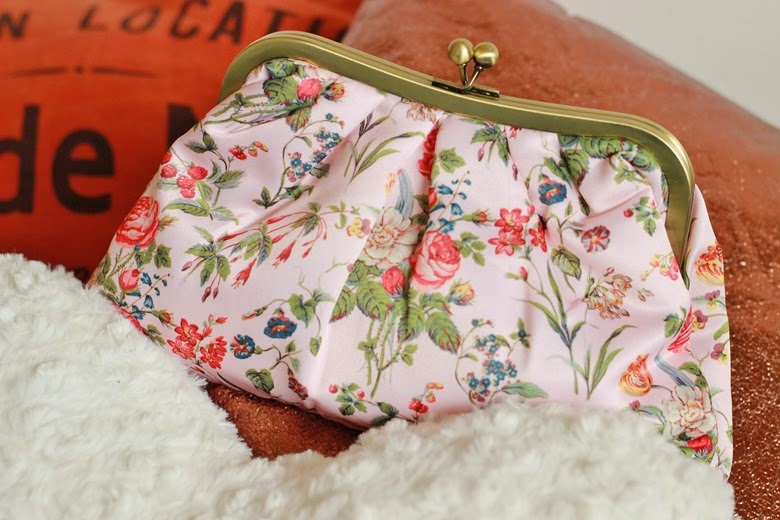
So this is a bit of a funny purchase and probably not to most of your taste. However I’ve always wanted to own an old style makeup bag with that purse style opening. I’m not sure what it is about them, but when you’ve searched through amazon AND e-bay for a particular style of bag you know your hearts set on it! So when I saw this beauty online I knew this opportunity wouldn’t come about too soon again. However paying £16 seemed a bit inflated, so seeing it on sale was awesome except long story short - out of stock - email me back when its in stock - when I got that email it said the bag was still on sale but everytime I clicked on the link it went back to the original price SO I emailed them and told them and guess what those lovely people did? They sent me a gift credit/card for £7.43!  Now if that isn’t great customer service I don’t know what is, thankyou feelunique! ^_^ Oh and the bag itself? More floral than I expected and actually larger than I thought so too but super super roomy! I finally got that bag I always wanted!


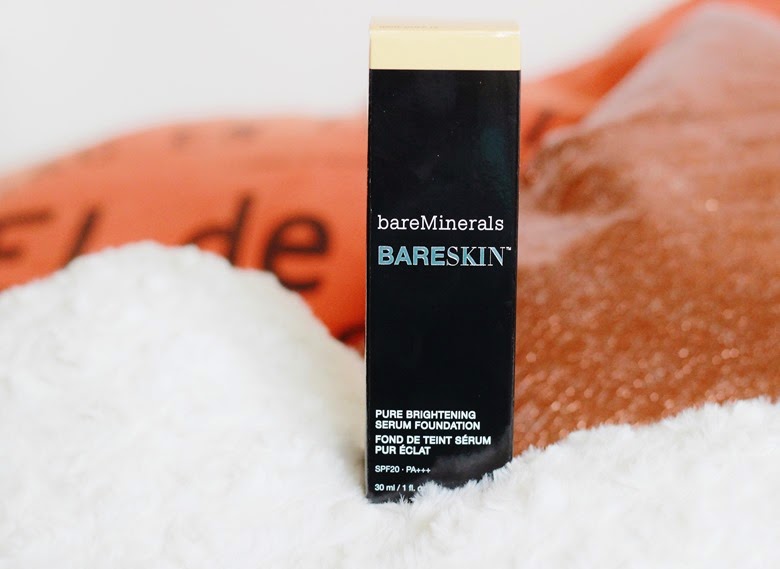
bareMinerals bareSkin Pure Brightening Serum Foundation SPF20

bareMinerals bareSkin Pure Brightening Serum Foundation SPF20 - £22.88

This foundation has been out in the US for a good couple of months but only recently came out here in the UK. Now since I’m no longer purchasing from MAC cosmetics I’ve been thinking about searching for a new light-weight base that is perfect for everyday and contains adequate coverage to even out skintone. I spent several hours reading up reviews and checking youtube videos for demos and I have to say I am so happy I picked this up. Now from FeelUnique this is already at a reduced price, and getting my gift card/number I had 2 days to use I knew I had to take the plunge and buy this for just over £15! That is what I call a bargain and a half ^_^ 

I’ve used this once and I am very happy with it. Of course I’m going to use it for two weeks straight before I type out a full blown review, but I have a couple of things I want to mentions....a) half the ingredients than a typical foundation and the first liquid base from bare minerals b) its a serum as well as a foundation c)buildable coverage and 20 shades to choose from d) feels light as air on the skin. So yeah so far so good. Oh and if those 4 points did intrigue you to go pick up a sample remember to shake it well because there are been reviews from people who clearly do not. So frustrating when people don’t read the instructions ._. you gotta shake this up just as much as F&B because it doesn’t have chemical binders within it.


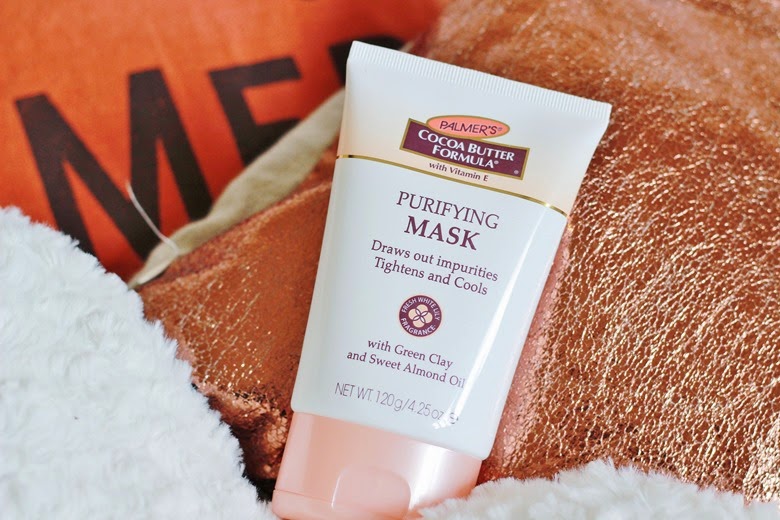
Palmer's Cocoa Butter Formula Purifying Mask

Palmer's Cocoa Butter Formula Purifying Mask - £6.49

Finally I decided to purchase this purifying mask from Palmers. I love their body lotions and grew up using them so when I saw that they had masks out I knew I had to pick one up! This mask claims to draw out impurities and it also contains sweet almond oil. I’ve used this once and was impressed with how clean my skin looked, yet how soft it felt despite this being a cream/clay mask. It’s an odd texture, a bit like cream-powder this stuff feels like a cream and dries as a clay. To be honest I didn’t have a WOW reaction to it like I did with the Super Facialist Tea Flower Pore Purifying clay mask, reviewed here. However I’m going to be using it once a week and I’ll hopefully post a review on it near the end of the year!

That’s one of my last hauls for a while! Have you ever bought anything from FeelUnique? Sign up to their emails to be notified of their awesome sales too ^_^


Thanks for reading!
 Follow Via Bloglovin' | Tweet Me | Follow on Instagram | Like The Blushing Giraffe on Facebook

September Beauty Haul (Feelunique & Soap and Glory)

september beauty hall feelunique soap and glory

As summer is ending I have been getting spendy. Well there’s less than two weeks till I’m back to being a full-time student and we all know how student budgeting works don’t we? My money book is back on my shelf and I will NOT be buying anything else beauty related till xmas sales. She says firmly to herself. Anyways on to the things I did pick up.

September Birchbox (+Special free gift)

september birchbox first impression review the blushing giraffe

Hello ladies! Today I wanted to share with you my first Birchbox. A few months back I tried Glossybox and I really enjoyed it ^_^ What I also loved about it was how easy it was to unsubscribe from the monthly subscription. There are so many boxes out there and I would rather dip into one box at a time, so this time around Birchbox got my monies!

september birchbox first impression review the blushing giraffe

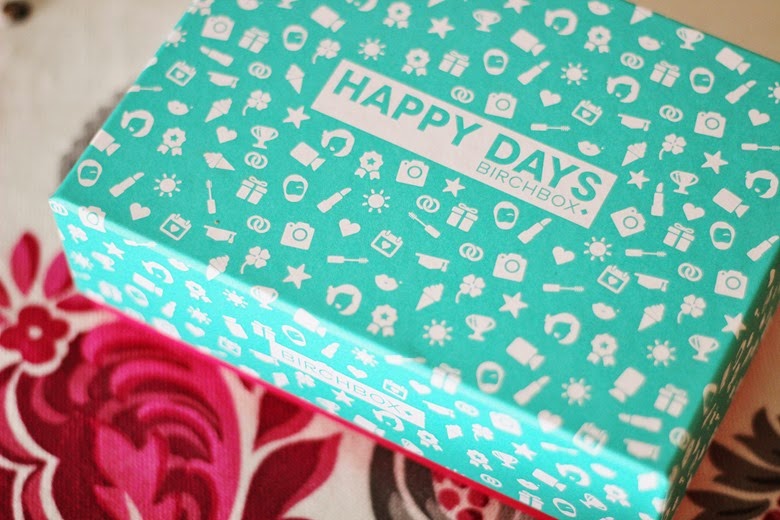
Birchbox gives you 4-5 beauty samples a month, and also includes one or two lifestyle things too! I loved how this was different to your standard beauty box. On the website you can also buy everything they sell in the boxes, and there’s a blog too where you they show you mini tutorials and read the product picks. This months box is themed as Happy Days with the idea that September is the month filled with nostalgia and reminiscing the happiest days of one’s life from school times. I think it is ADORABLE how much effort the creators and team at birchbox have put into this. The whole pink and teal theme is lovely too. One thing to note is that this box is surprisingly small compared to the glossy box, I’d say around 15cm. BUT it turns out great things do come in small packaged...(that is the saying right??).

september birchbox first impression review the blushing giraffe

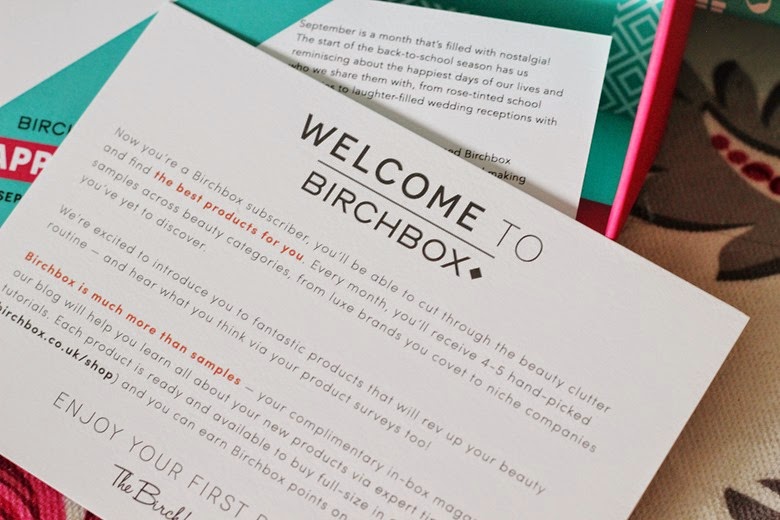
Inside the box you get 3 cards. A welcome note which is pictured above and explains what birchbox is about.  Another card which talks about the September box, why they picked this theme and on the other side the names of the products, as well as what they are and how you use them. It also has the price of the full sized product. The third thing is the cutest little magazine which has tips on how to have a happy start to your day, a how-to-make a frame and finally some words on a few of the products inside the birchbox.

september birchbox first impression review the blushing giraffeseptember birchbox first impression review the blushing giraffe

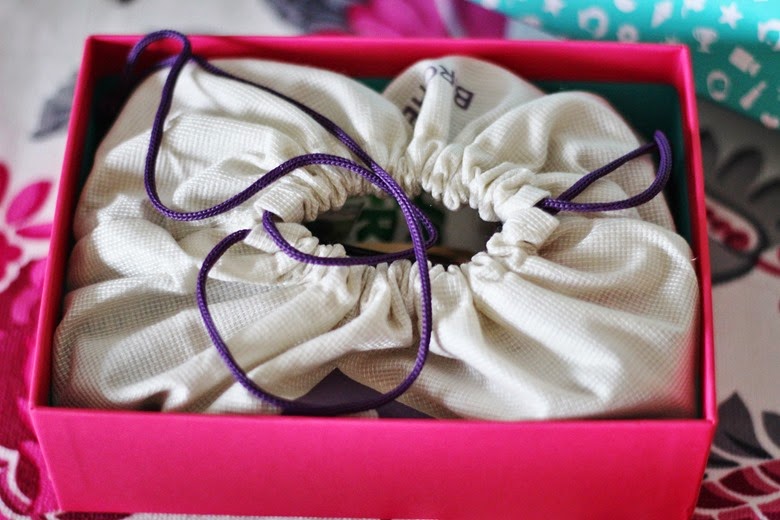
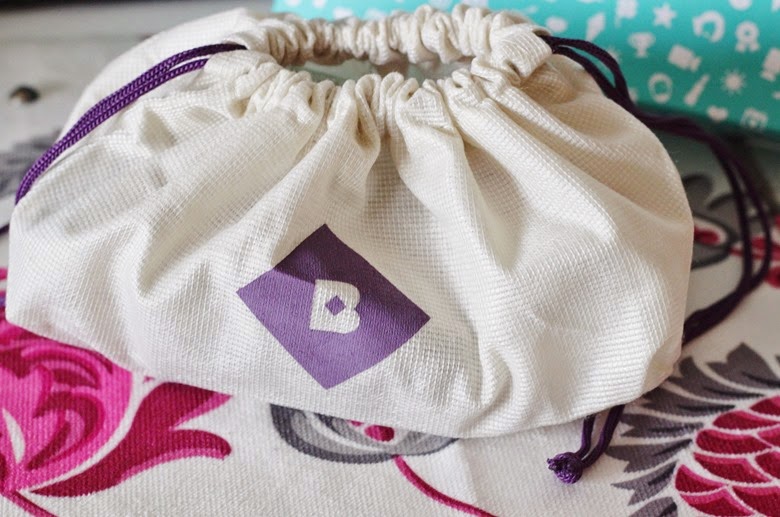
Inside the box there’s a small drawstring bag with the birchbox logo. It’s also a nice change from crepe paper and again a sweet touch in my opinion.

september birchbox first impression review the blushing giraffe

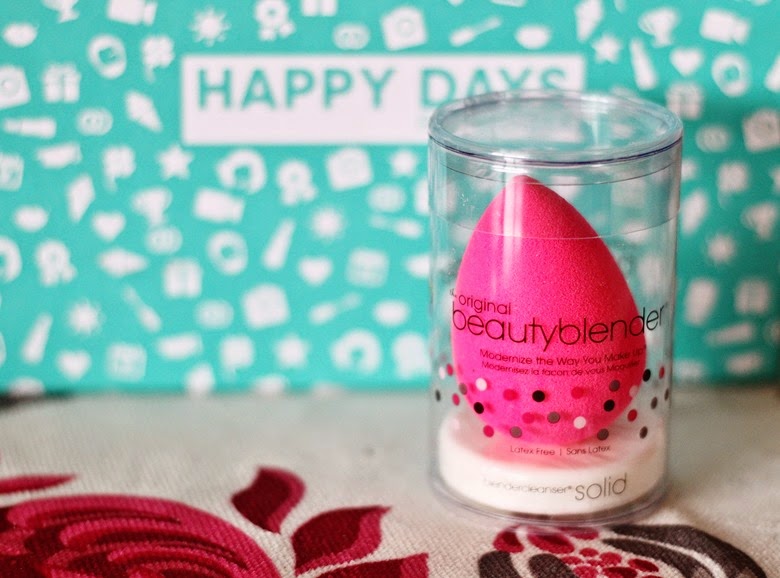
and YUP that IS a beautyblender you see there!!! This was the reason why I decided to order this box, but more on that in a bit, lets explore the contents of my box.

september birchbox first impression review the blushing giraffe

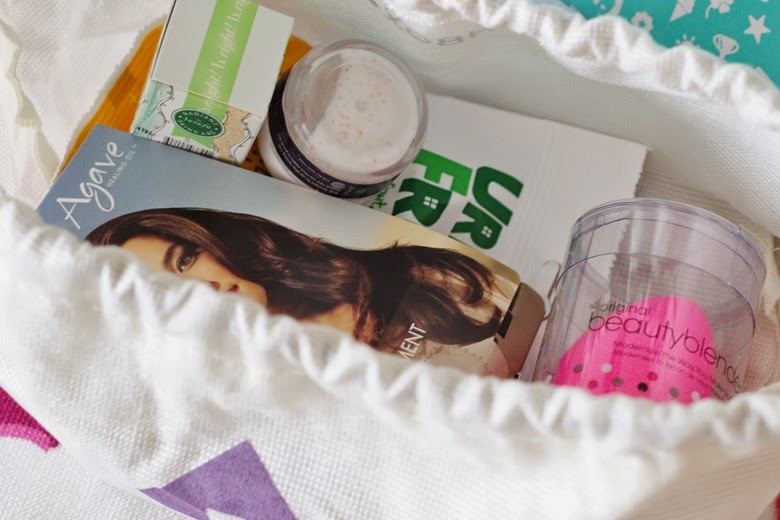
My four beauty samples are:

  • Agave healing oil treatment - A lightweight oil to smooth hair and boost shine. You warm up a 5p-seized amount and smooth from roots to ends.
  • Benefit It’s Potent Eye Cream - I already had a luxury sample of this cream and enjoyed using it, although I didn’t notice much difference in dark circles being gone at all. This little sample is the most adorable thing ever, 3g of the stuff and the pot is the width of a 10p coin. So cayyyooot.
  • Premae Mild Dermabrasion Face and Body Scrub -Body scrub which contains olive granules to smooth the skin and it’s also gentle enough for the face. I’ve never heard of this brand so I’m excited to try it!
      • MODELCO Power Lash Mascara - This has a unique shape which capture tiny lashes for maximum impact with minimal effort. The full size costs £24 so I’m very curious to see if it matches up to that price tag!
The way the company chooses the products for you is by providing a short questionnaire for your beauty profile. I believe you can change your answers too (but don’t quote me!).

september birchbox first impression review the blushing giraffe

and the STAR of the show, the Original Beautyblender AND the blendercleanser solid which is worth £26! I know! £26 for a sponge and a bar of soap 0_O I knew there was no way I would fork out that much money for a sponge so when I saw that birchbox are giving a beautyblender with EVERY box this September I knew I had to buy it! *happy dances* and the reason I’m posting this on the same day that it arrived on my doorstep is because I want any of my lovely readers, who were also considering the beautyblender to be aware of this awesome deal! The box costs £10 + £2.95 postage and YOU GET A £26 FREE GIFT WITH IT!!!! AHHH SUCH A BARGAIN ^___^
september birchbox first impression review the blushing giraffe

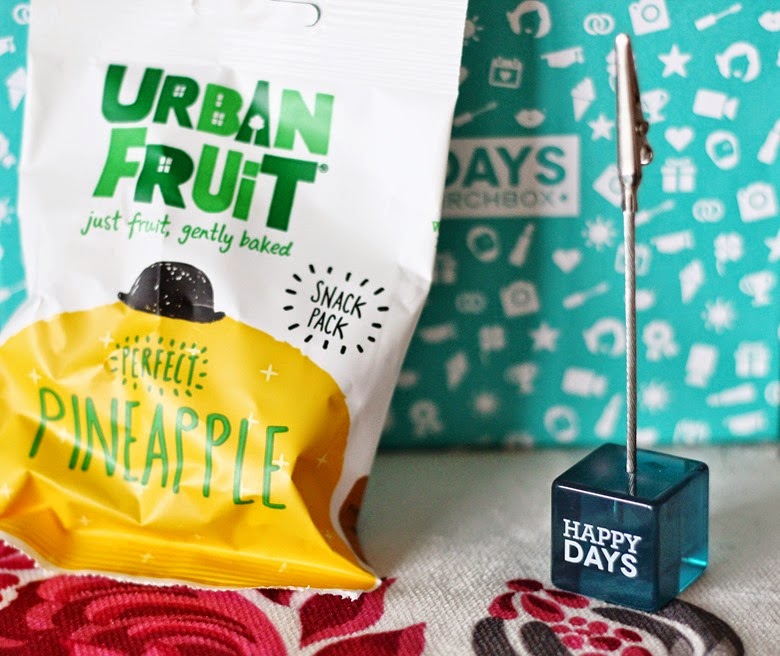
The lifestyle picks are this Urban Fruit Snack Pack which amazingly is 100% pineapple! They’ve been ‘gently baked’ and lightly sprinkled with rice flour to keep the from sticking together. The idea is that people still eat fruit but in a less messy more convenient way. I got the pineapple flavour and I must say its nice to eat something healthy from a plastic bag haha.

The last thing put an even bigger smile on my face (even though my cheeks were already aching from the beautyblender ha). Its a Birchbox happy days photo clip so adorable! A mini photo holder which looks perfect for my huggleup prints (read my review of that company HERE).

All in all I am very impressed with my first birchbox and I’ll keep my subscription going. The effort into the branding, the variety of high-end and new brands and especially the lifestyle element have left me giving birchbox big thumbs up! Remember ladies if you want that beautyblender and cleansing soap, make sure you pick up this box in the next 10 days, its an offer not to be missed ^_^

Also they have a refer your friends scheme, so if you are going to buy the box after, by clicking on this link right here you will also get £5 to spend in the birchbox e-shop which has a huge range of brands to choose from. Yes, that’s right a free beautyblender with cleanser AND £5 for the price of a standard beauty box - you can thank me later ;D Once you are a subscriber send your own link to all your friends (and aunties, I bet they’ll love it) and watch the rewards pile up!

Are there any beauty boxes you would recommend?

Thanks for reading :)

 Follow Via Bloglovin' | Tweet Me | Follow on Instagram | Like The Blushing Giraffe on Facebook