My five minute summer face

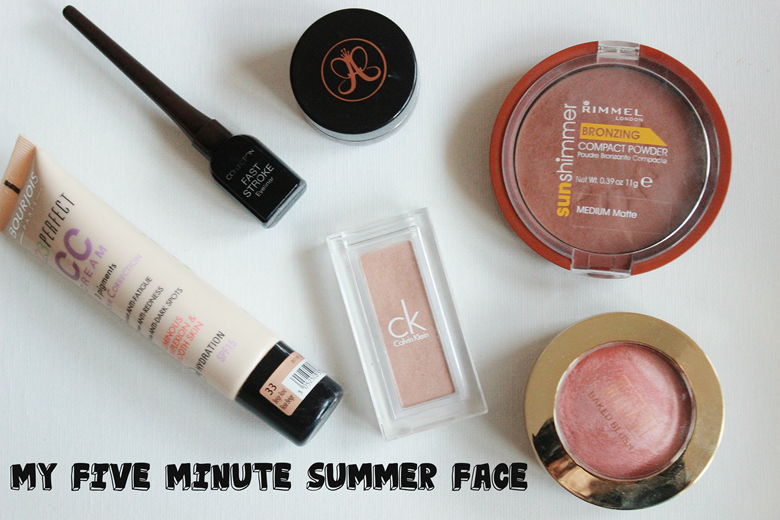
my 5 minute summer face

IMG_7925
After my last slightly rant post, I thought I’d post something a little lighter!
So recently, as the heat has been turned up in England, and also throughout Ramadan I’ve not really been in the mood to sit and take my time with my makeup. I want something quick, light and fresh looking!

I always do my concealer routine for dark under-eye circle (you can read that here), after applying my base, the Bourjois 123 perfect CC Cream with my fingers. I have been LOVING this base, it gives medium coverage and really does colour correct any redness I have, which reduces the amount of concealer I use. However my skin still looks like skin, just less flawed.

I then go in with my Anastasia Beverly Hills Brow Pomade in either Chocolate or Dark Brown, depending on if I want a stronger brow, or a softer one.

Then I take my big RT Powder brush and using the ‘three motion’ and use the Rimmel Bronzing Compact Powder in Medium Matte which is fantastic for warming up the face, especially as the CC cream in shade 33 is a TAD light for me in the summer time. I love how this bronzer is slightly more red toned, which works well for medium tones especially, and it adds so much warmth to the face!

My favourite blusher lately has been the Milani Baked Blush in Luminoso y’know the one you hear American YouTubers rave on about? I couldn’t resist picking this up and I fully understand the hype! Not only is it stunning, but it adds a gorgeously healthy flush of colour to the cheeks, that almost makes you look lit from within!

 On the eyes I keep it simple and add a wash of Calvin Klein E/S in Tangelo which I have reviewed here. My absolute favourite single shadow, it brightens up the whole eye area and is not too dark to use as an inner-corner highlight too! Finally I quickly line my eyes with Collection Fast Stroke Eyeliner in brown. I love the brush, and for less than £4 this is honestly worth so much more!

I know it seems like a lot, but with practise I can do this all in around 5 mins, and its been such an easy look to go for on work days! I hope that was helpful for some of you ^_^ 

What do you turn to on busy days?

Thanks for reading!

My five minute summer face

my 5 minute summer face

I am an Ethical beauty blogger now. (boycotting brands)

boycotting

Hey ladies! So I mentioned in my previous post, that I’ve not really been in the mood for blogging, playing with makeup or reading about the whole beauty world in general.

Why you ask? because I stand up for innocent women and children who are being forced to live in unbearable conditions - and every single day, I wake up in the comfort of my home, and on the other side of the world the death toll in Gaza rises. I can’t believe in 3 weeks over 1100 people have been killed by the Israeli army...and three days ago it was Eid - a celebration to mark the end of fasting and STILL they bombed Palestine and killed 10 CHILDREN.

So imagine YOUR day of festivities, whether its Christmas, Hanukah, Diwali - imagine on that day, losing your brother or sister, your children, your niece or nephew to terror and violence. It makes me SO sick. and I am beyond angry with the useless world leaders, who sit back and watch the death toll rise, using the lame ‘they have a right to defend themselves’ line which is the most pathetic excuse in existence. Why? Because in the last 10 years that Israel has been “defending themselves” Gaza has killed 29 Israelis and Israel has killed over 5000 Palestinians, many of them children. Anyone who can read this, or see any of the heart breaking photos of children who have been killed, or injured so badly they are amputees for the rest of their lives, and STILL show no compassion - they’ve seriously lost their sense of humanity.

Here is a very short video from Jon Snow, of Channel 4 who is an outstanding Journalist. I respect him so much, he went out to Gaza and witnessed what was happening first hand, and STILL reported the truth, unlike the BBC.

This is not about religion. This is about standing up for innocent children and women who are murdered simply for existing. The world might turn a blind eye, but I will not.

So what has this got to do with beauty?

As a family, we have all started boycotting products that came from illegal Israeli settlements in Palestine. Last year the boycotting of grapes and dates alone lost Israel over $24 million dollars! By choosing produce from other countries, and not funding the Israeli occupation we are taking a step forwards in the right direction. However I wanted to take another step, and perhaps a whole leap forward.

Israel is heavily funded by the US and UK government who take our (tax payers) money and help to finance the genocide in Palestine. Our hard earned money already goes towards the conflict, and we have no say over that. I mean by all means sign petitions and go on marches so that the leaders of these corrupt governments change their ways! But ladies, let me tell you something we DO have control over  - the makeup products that we buy.

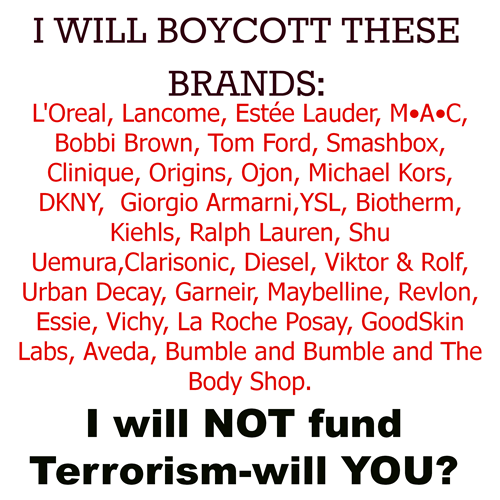
There are three main organisations that I know of who openly fund Israel, and can do so with ease because they generate MILLIONS AND MILLIONS through the beauty industry. All brands under L’Oreal, Estee Lauder and Procter and Gamble. I have compiled a list for you to see here:

boycottzionism

and if you’re not sure about any of them, you can simply Google ‘owner of *insert brand name here*’ and all the stats and articles will come up as clear proof of their support of Israel and essentially their support of the illegal occupation and the bombing and murdering of hundreds of children.

Now that I know that every time I purchase a product from one of these brands, part of that money is going to kill helpless babies, children just like my own siblings with hopes, dreams and aspirations, heartbroken widows, and thousands of innocent people I realise how important it is to STOP FUNDING TERRORISM. Some people sneer at boycotting, stating that it won’t make a lasting difference but I disagree.

Firstly if enough people did boycott, sales would drop drastically and these company owners would find it VERY expensive to continue funding the murder of innocents in Palestine. But more to the point, whether you boycotting these companies makes an outstanding difference or not, can you really live comfortably with yourself knowing that your money will be funding the death of those babies? I am looking at my muji drawers, and quite honestly I am feeling sick wondering how much of my hard earned money has found its way into the pockets of these cruel heartless monsters.

Makeup-up is nice, pretty, fun to play with and experiment, but NEVER is it worth more than an innocent human beings life. You buying from these brands, is you funding the bullets that kill those children. I don’t really understand how I can make it clearer as to why I am boycotting, and I think still some people won’t understand *sigh*

I know that unfortunately the most well-known and most talked about brands seem to be on this list, and as a beauty blogger its very frustrating because to be honest I don’t want to be raving about a product which has unethical owners, thus promoting funding these monsters! But I own so many things that are created and owned by these people! Gah!!

Having said that, in case you haven’t already realised I am VERY passionate about human rights.

If any country, created the largest human prison on earth, on a country they had occupied and then restricted the electricity and water supply, stopped people from crossing the border just because they felt like it, and killed a child every 3 days for the last 10 years, I would oppose them just as strongly as I oppose Israel. Palestine and the death of innocent people, especially children will ALWAYS be more important to me than what I put on my face. Its a no-brainer right?

I’ve been asked to make a list of brands that do not sponsor/support the Israeli occupation but to be honest guys its most brands that are not on this list, and if you have any doubts then google the owners of the brand with either zionism or Israel and you’ll get your answer.

I know its drastic to boycott so many brands. But humanity comes before makeup, before money, before anything. The day that I lose humanity is the day that I have failed to be a decent human being.

I apologise if this post has upset you, but I feel responsible to spread the truth about these brands. Even if one girl out of the hundreds that will read this post, stops buying from those brands, I feel like this will be beneficial.

Just ask yourself, if that was your little brother/cousin/niece or nephew out there being mercilessly killed just for existing, would you continue to buy the mascara that helps fund the monsters who would, and have killed them in a heartbeat? I know I wouldn’t.

I hope you can respect my decisions to boycott these brands, I will still be beauty blogging! Just talking about more ethical brands that do not support the Genocide in Palestine :-)

Please let me know if you have ANY questions at all!

I am an Ethical beauty blogger now. (boycotting brands)

boycotting

Hey ladies! So I mentioned in my previous post, that I’ve not really been in the mood for blogging, playing with makeup or reading about the whole beauty world in general.

Why you ask? because I stand up for innocent women and children who are being forced to live in unbearable conditions - and every single day, I wake up in the comfort of my home, and on the other side of the world the death toll in Gaza rises. I can’t believe in 3 weeks over 1100 people have been killed by the Israeli army...and three days ago it was Eid - a celebration to mark the end of fasting and STILL they bombed Palestine and killed 10 CHILDREN.

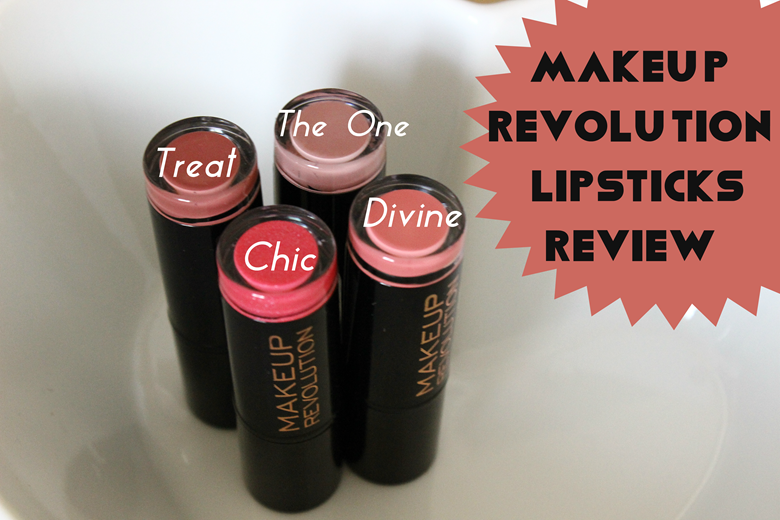
Review | Makeup Revolution Lipsticks in Treat, The One, Chic and Divine


makeup-revolution-lipsticks-review-swatches-the-one-chic-divine-treat

Hello everybody, apologies for the lack of posts. A mixture between Ramadan lathargic-ness and feeling very deflated by the ongoing genocide in Palestine really hasn’t inspired me to blog. Anyway more on that in the update post.

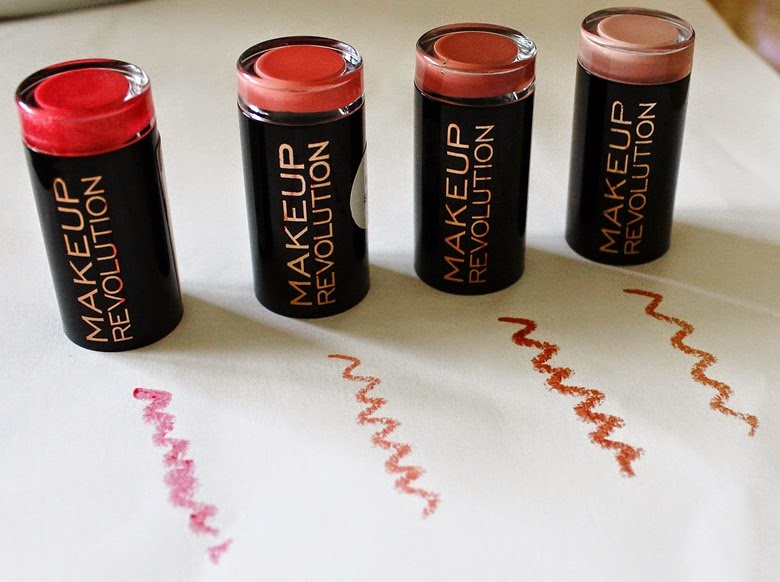
Makeup Revolution is the new MUA brand of the internet. Its been raved about by so many beauty bloggers, around a month ago I couldn’t resist picking a few bits up myself! Instead of doing a haul, I’m just going to be posting reviews as and when I’m ready. I will say though that I’m not super happy with my swatches, and will try and rustle something up on the instagram to show you clearer swatches later on!


makeup-revolution-lipsticks-review-swatches-the-one-chic-divine-treat

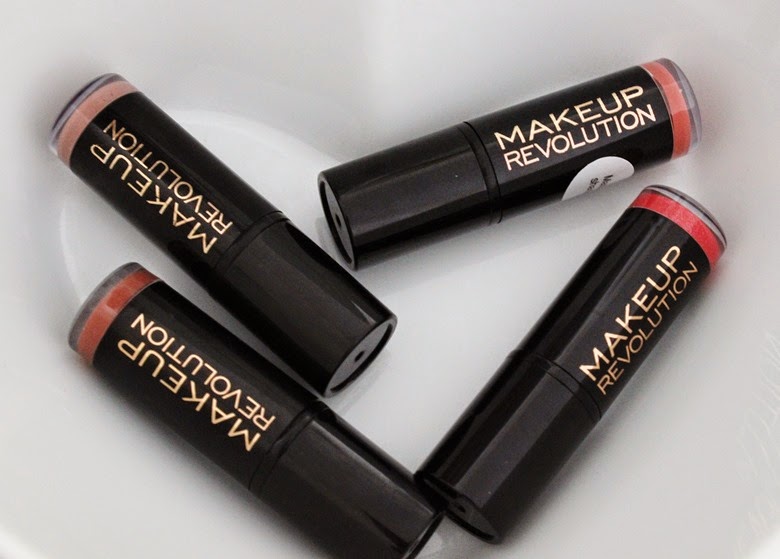
So starting with the packaging, you get what you pay for - you’re spending £1 so expect a lippie that could open in your bag, and isn’t the most sturdiest. They do the job however and for the price I really can’t complain. They do look very similar to MUA’s lipsticks, BUT I don’t think you can open the transparent part on the lid (please let me know if you can I’ve been trying so hard haha.) I do like the rose gold font however! It shows that the brand is on trend ^_^

makeup-revolution-lipsticks-review-swatches-the-one-chic-divine-treat

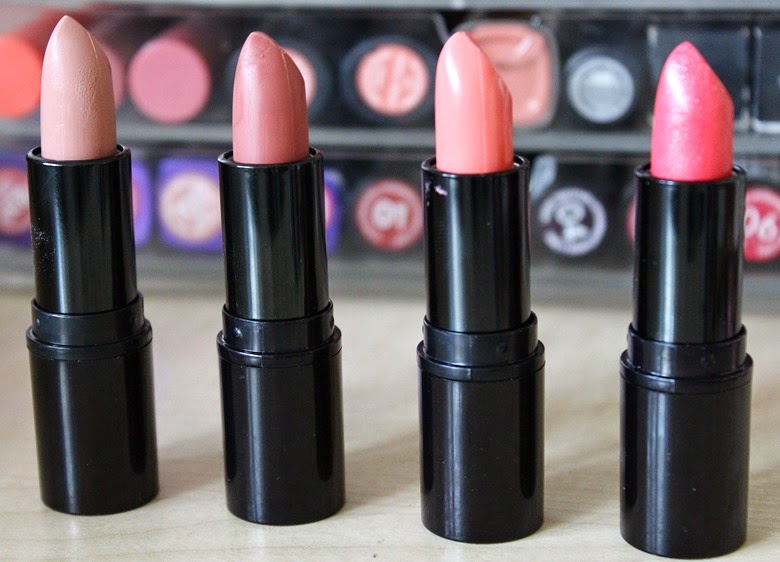
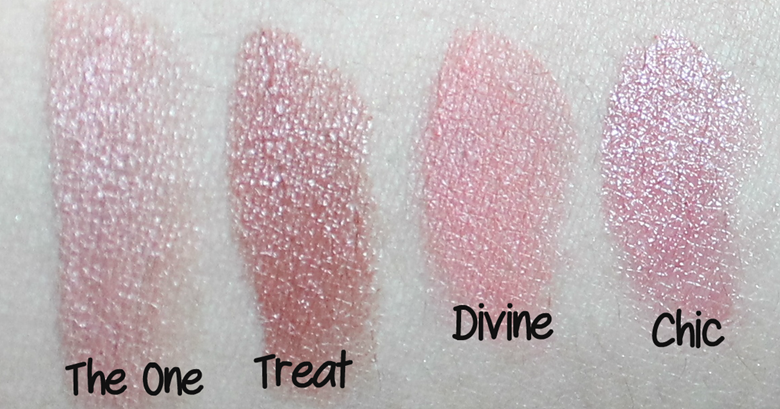
The One- The palest colour lipstick in my whole collection, this will definitely give anyone with a warm skin-tone an ill look, however it is perfect for lightening-up any shade so I will be getting my moneys worth from this one! The texture is soft, and pretty pigmented, although it does have the tendency to sit in the fine lines on my lips, so again used alone this wouldn’t be the most flattering shade!

Treat - My favourite of the bunch! This is a gorgeous my lips but better shade MIXED with a touch of brown. Upon first application I instantly thought of the famous Kylie Jenner look just not matte! On reflection i wouldn’t say that this is the PERFECT shade if you’re going for her exact look, but the touch of brown adds a classy 90’s edge to any look and I honestly have had nothing else on my lips since I bought it! The formula again is fabulous, very moisturising and after 2 hours its still there as more of a stain which I quite like too! This is the only shade that I will be repurchasing in the future :)

Devine - The only matte lipstick I picked up, and I’m glad I didn’t venture into other shades. The formula is the standard drugstore matte type, a little difficult to apply and you do have to tug on the lips. The colour is quite a bright/loud coral and not as similar to the one in the bottom of the packaging! But annoyances aside this is a ok matte lippie, one I’ll probably try and mix with another shade to subdue it a little, but still wearable..just about.

Chic - This one I was the least prepared for because it has bit of glitter in it! NEVER something I go for ever (I mean maybe for a fancy dress?!) I prefer glitter on my eyelids for a special occasion, and so I wasn’t massively impressed with Chic. Having said that they aren’t as noticeable on the lips, and the colour itself is a nice neutral pink, but if you were having a conversation with someone face to face they probably WOULD notice the specs of glitter...at least the formula is fab!

makeup-revolution-lipsticks-review-swatches-the-one-chic-divine-treat

So all in all fairly hit and miss I would say! But for £1 a lipstick, I have enjoyed my first introduction to Makeup Revolution’s lipstick selection, and if you head on over to their website you’ll discover they have an amazzzzzing range of colours to choose from! (Even blues and yellows!)

Have you tried any of these Lipsticks? Any shades you would recommend?


Thanks for reading!

Review | Makeup Revolution Lipsticks in Treat, The One, Chic and Divine


makeup-revolution-lipsticks-review-swatches-the-one-chic-divine-treat

Hello everybody, apologies for the lack of posts. A mixture between Ramadan lathargic-ness and feeling very deflated by the ongoing genocide in Palestine really hasn’t inspired me to blog. Anyway more on that in the update post.

Makeup Revolution is the new MUA brand of the internet. Its been raved about by so many beauty bloggers, around a month ago I couldn’t resist picking a few bits up myself! Instead of doing a haul, I’m just going to be posting reviews as and when I’m ready. I will say though that I’m not super happy with my swatches, and will try and rustle something up on the instagram to show you clearer swatches later on!

Blogiversary | A few of my favourite posts...

topposts theblushinggiraffe

Hello lovely ladies! Just a quick post today to share a few of my favourite posts from my first year of blogging.


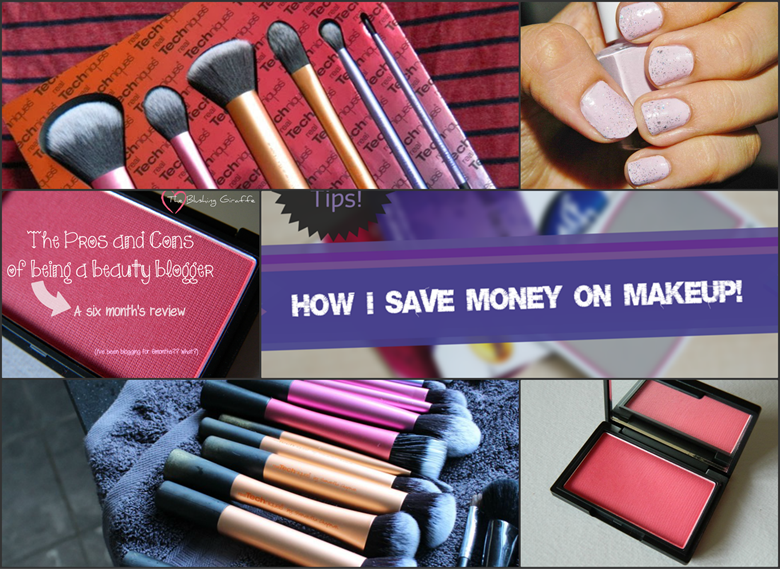
1. Review of Real Technique’s Sam’s Picks

My all time favourite brush set ever, this was supposed to be limited edition but you can still buy it today! Its an amazing set, and I have reviewed each brush in detail. The perfect set for someone who doesn't want to own a tonne of brushes (unlike myself) OR for the brush-a-holics because it includes the multi-task brush and a set exclusive! Basically ladies, its a winner regardless of your brush situation!


2. Lilac Ombre Nails

I don’t post too much about nail polish, but lilacs and purples are my favourites and the glitter ombre looked so pretty! (Although the above photo isn’t the best of it to be honest).


3. The Pros and Cons of being a beauty blogger (6 month review)

Woah how has it been 6 months since I wrote this? A bit of a spontaneous one, but I think it’s quite insightful, espeically as a lot of girls have approached me and asked me to give them tips about starting up their own blog, it’s handy to have most of them written up in one post!


4. How I save money on makeup

One of my favourites, because I really am a bargain hunter! I rarely pay the full-price for anything (its the asianess about me haha) and in this post I shared my top tips to shop savy!


5. How to thoroughly wash your makeup brushes

Again a post I’m particularly proud of because washing brushes is so so important, and here I run through the routine I’ve been using, which has not only thoroughly cleaned them but conditioned them too. I’m always very happy with the quality of my brushes, some after 2 years of owning! And its all because of this routine :)


6. Review - Sleek’s Flamingo blush

Finally another review, I’m not sure if it’s the blush itself or the way its written...there’s just something about this one that I like a tad more than the others haha!

And the most recent favourite of mine....

How I cover up REALLY dark circles


I hope that gave you a little taster of The Blushing Giraffe ^_^

Remember to enter my blogiversary giveaway, which was posted yesterday if you would like to win a few of my absolute favourite things!


Thanks for reading!


Follow Via Bloglovin' | Tweet Me | Follow on Instagram | Like The Blushing Giraffe on Facebook

Blogiversary | A few of my favourite posts...

topposts theblushinggiraffe

Hello lovely ladies! Just a quick post today to share a few of my favourite posts from my first year of blogging.

The Blushing Giraffe’s Birthday Giveaway!

the blushing giraffe's birthday giveaway

cupcakes Source: Tumblr.com
Ahhhh! Happy blog birthday to me! I can’t believe I’ve been blogging for a whole year you guys, and after 365 days of owning this little spot of the internet, learning realms of information regarding beauty and....well starting a skincare routine, I am pretty proud of it!


Not to mention the wonderful ladies I’ve had the pleasure of meeting through mutual love of picking up bargains in the beauty world, sharing fantastic products that are worth the monies as well as discussing our cheeky splurges!

Getting involved in the blogosphere has been one of the best decisions I have made, not only is it a productive hobby, but you learn so many skills. You’re essentially the writer, photographer and editor and although it is time consuming, looking back and seeing how far you have come is really motivating.


I will be doing two posts soon, one with all my favourite blog posts of the past year and another sharing the bloggers who I adore!


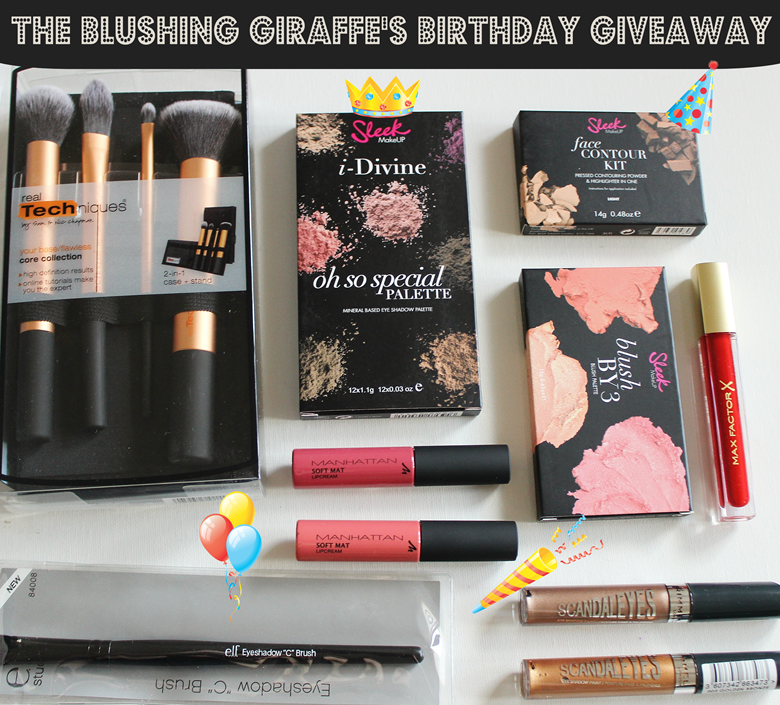
To celebrate one year of blogging, and to say thankyou to all my loyal readers I wanted to give away a few of my favourite things. This giveaway will be international and open for ONE MONTH. I have used the standard rafflecopter app to make life easier for us all!

IMG_7713IMG_7720IMG_7728


Prize:
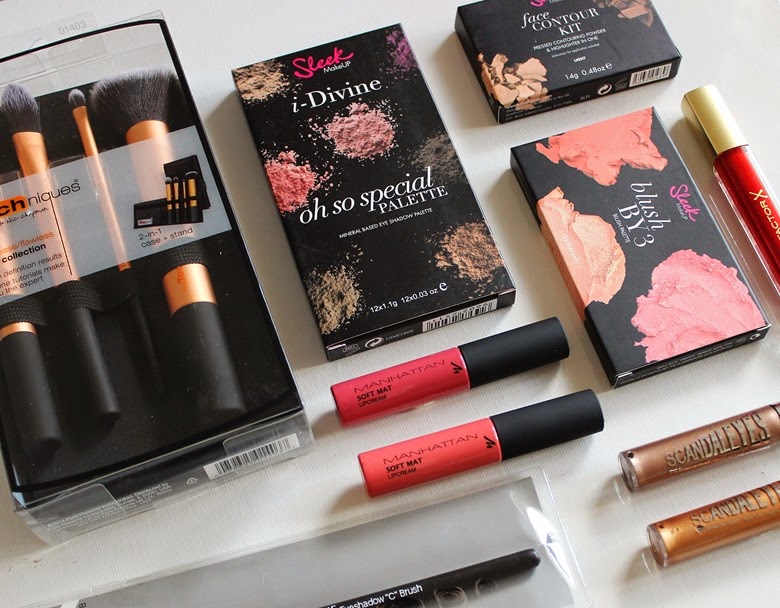
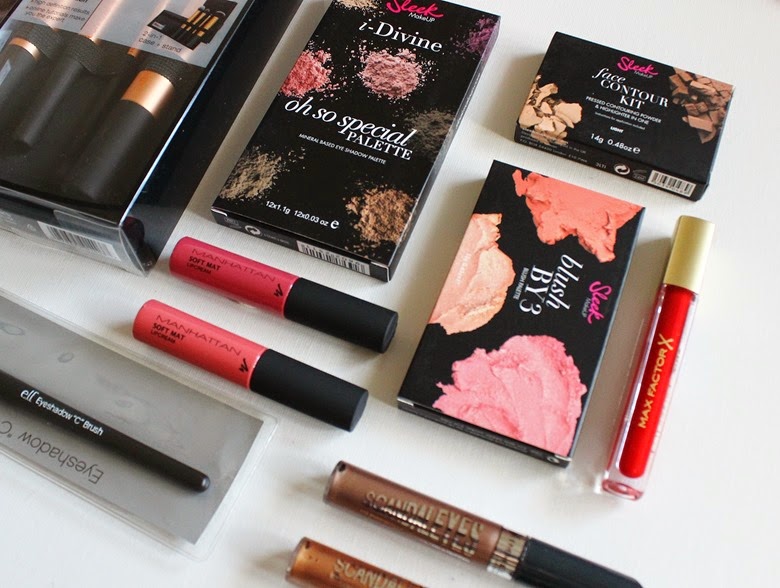
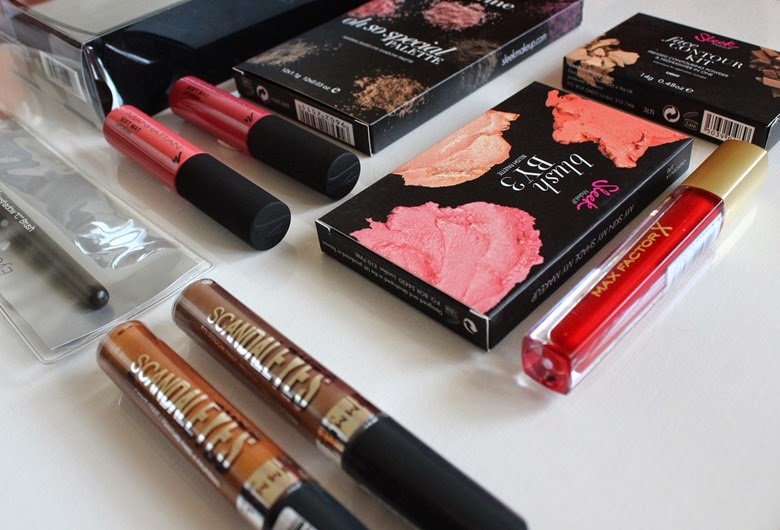
- Sleek Contour kit in Light
- Maxfactor Lipgloss in Captivating Ruby
- E.L.F Eyeshadow C brush

(click on the different coloured ones to read reviews!)

I have bought everything with my own money, aside from the lipgloss which is a shade I would never wear, so I figured it could end up in a better home! :)

I did want to purchase a Sleek contour kit in medium aswell, but sadly they were out of stock. This shade works very well as a natural contour on me personally, but if someone with a deeper complexion than me does win I will do my best to buy the correct shade accordingly!


Rules:
As this is for my followers only, in order to enter this giveaway you must:
1. Follow me on bloglovin’, Instagram and like my facebook page (all links will be in rafflecopter) and I will be closely monitoring the enteries, so please make sure you have done all three mandatory options. There are others that are optional, and will increase your chances of winning.
2. Be 18 years of age and over, or have parental consent because i’ll need your address if you win
3. Be a reader of this blog! So NO competition/giveaway accounts, this is for my lovely readers only, so don’t waste your time ^_^
4. Don’t follow to unfollow, its not cool yo...have a look around The Blushing Giraffe, if you like what you read then by all means follow, if its not your cup of tea then please don’t...simples J
5. There will be one winner overall!


Goodluck to EVERYBODY! Thank-you for your continuous support ^_^

The Blushing Giraffe’s Birthday Giveaway!


the blushing giraffe's birthday giveaway

Collaboration | Top 5 Drugstore Makeup Products! - The Quirky Hijabi

collaboration

Hello guys, I am thequirkyhijabi (blog link here) as many of you may know. I have only recently blogging on my main passion; Fashion. Currently Fashion and Textiles Student going on to study Fashion at university this year.

Well this collaboration is about my top 5 Drugstore Makeup Products.

I have always had a high interest in makeup since my school days, and my favourite makeup product would have to be lipsticks. Any vibrant lipsticks can make my day - then again I can’t go a day without eyeliner.

Top 5 DRUGSTORE Makeup Products;

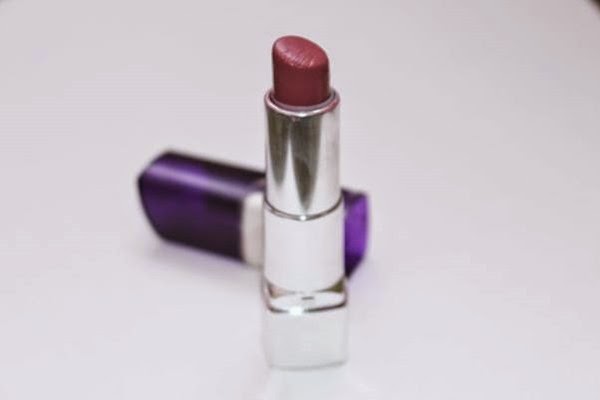
1. Rimmel London – Vintage Pink Moisture Renew.

clip_image002

Lipsticks are always top on my list! This is one of my everyday natural shade lipsticks, I find this lipstick really nice and moisturising. I feel that this lipstick lasts longer than others, and doesn’t make your lips dry at all during the day. However it is not very pigmented but I guess that’s okay if you’re going for a very natural look as the shade is very natural with a hint of pink.


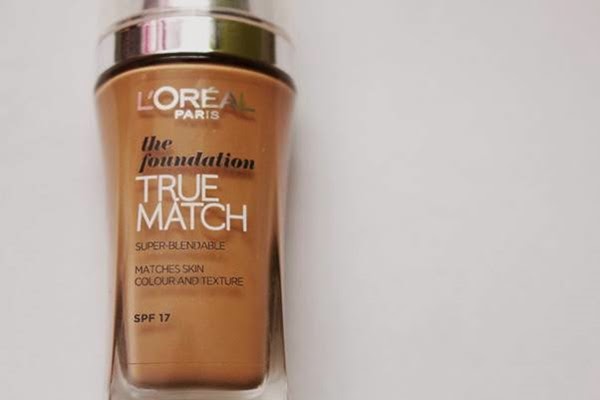
2. L’Oreal True Match Foundation – Natural Beige

I have been through a few foundations, but this foundation has best suited my skin so far, the first foundation I have come across in drugstores that provide warmer shades, as most foundations just do cool shades, which is actually a let-down for people who have darker skin tones like me. I find it very easy to use as it blends very easily, with high coverage too.

clip_image004


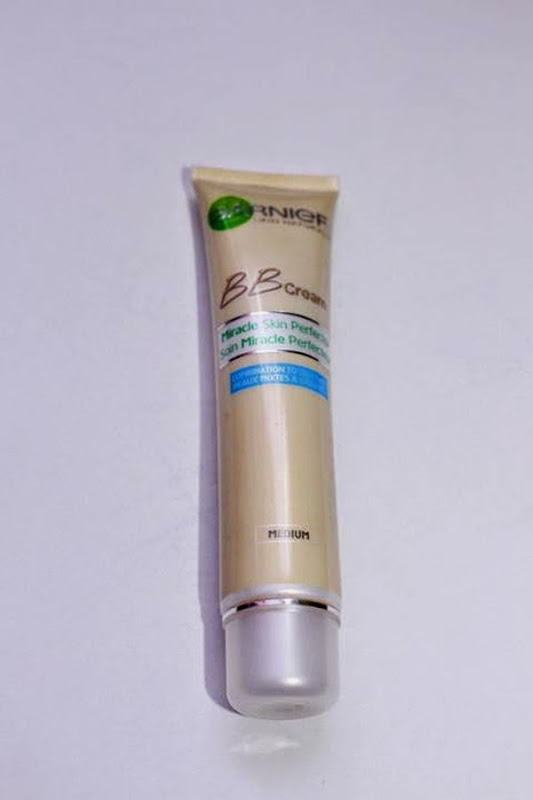
3. Garnier BB Cream – Medium

For everyday use the first BB cream I have bought this product is amazing, as some days you don’t really want to be wearing a ton of foundation, I find this BB cream great cause its very light on the skin, not heavy. Also it illuminates the skin making it look brighter and more alive.

clip_image006

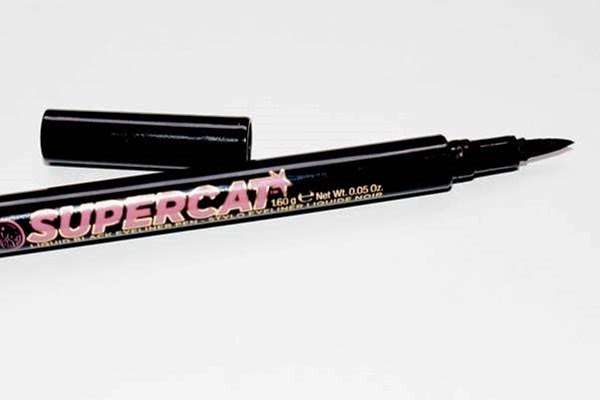
4. Soap And Glory – Carbon Super Cat Eyeliner

Eyeliners are a key, I can’t go without eyeliner! I love this eyeliner, it has lasted me about 3 months now, and due to it being a pen normally they don’t last that long I would say. I find this eyeliner very easy and quick to apply, I would recommend this eyeliner to beginners as it’s very easy to use.

clip_image008


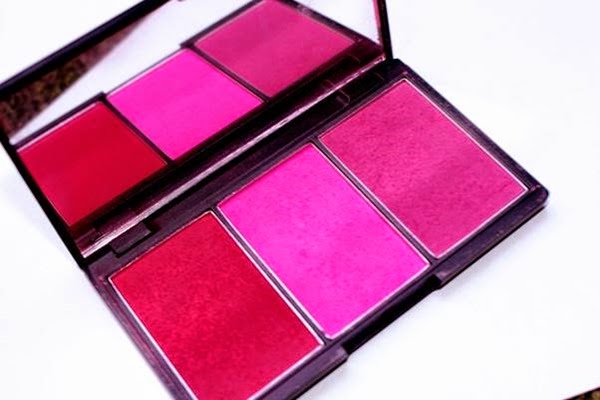
5. Sleek – Blush by 3 - Pink Sprint ( Pink Parfait, Pink Ice, Pinktini )

I am a fan of sleek. I absolutely love their products. Their blushers are amazing, and their eye shadow palettes are beyond beautiful! I would have to choose this blush set. With the 3 pink shades, I like the colours however the darker shades are more pigmented which is a hassle as you have to limit how much you use. If not then the blush can only result being blotchy.

clip_image010

Instagram – thequirkyhijabi

Blog – thequirkyhijabi.wordpress.com

Make sure you head over to Mariam’s blog to read MY top 5 picks from the drugstore! (It was no easy job to whittle it down to five, but I’m happy with the ones I chose ^_^)

Thanks for reading!

 Follow Via Bloglovin' | Tweet Me | Follow on Instagram | Like The Blushing Giraffe on Facebook

Collaboration | Top 5 Drugstore Makeup Products! - The Quirky Hijabi

collaboration

Hello guys, I am thequirkyhijabi (blog link here) as many of you may know. I have only recently blogging on my main passion; Fashion. Currently Fashion and Textiles Student going on to study Fashion at university this year.

Well this collaboration is about my top 5 Drugstore Makeup Products.

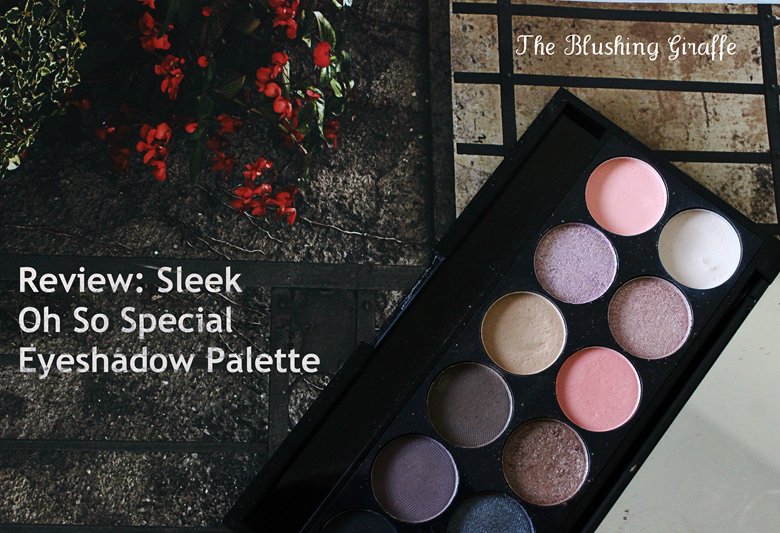
Review | Sleek Oh So Special Eyeshadow Palette

sleek-oh-so-special-eyeshadow-palette-review-swatches

Hello lovelies! I was organising my eyeshadow palettes and looking at the insane number of Sleek ones I’ve managed to collect over the past few years, I was bamboozled about why I haven't reviewed any of them yet?! To be really honest with you all, I despise doing swatches but I’m trying my best so I hope they aren’t too bad!)

sleek-oh-so-special-eyeshadow-palette-review-swatches

Sleek are very well known for their eyeshadows and their blushes and as a brand they have only gotten better and better with the years! Their palettes cost £7.99 which is incredibly affordable and amazing value for money, so you can’t blame me for ending up with more than two/three! If I had to pick an all time favourite from the ones I own, it would be the Oh So Special Palette. It has every single shade I could want or need for a daytime or evening look!

I’ve owned this palette for at least a year and a half and when the Naked 3 palette was released I was surprised by how much the swatches online reminded me of this very palette! No, the pigmentation doesn’t rival Urban Decay, but for everyday with a decent primer this is amazing. Also, this is one of their older palettes and the newer one’s formulas are even more refined - Sleek really are getting better and better!

sleek-oh-so-special-eyeshadow-palette-review-swatches

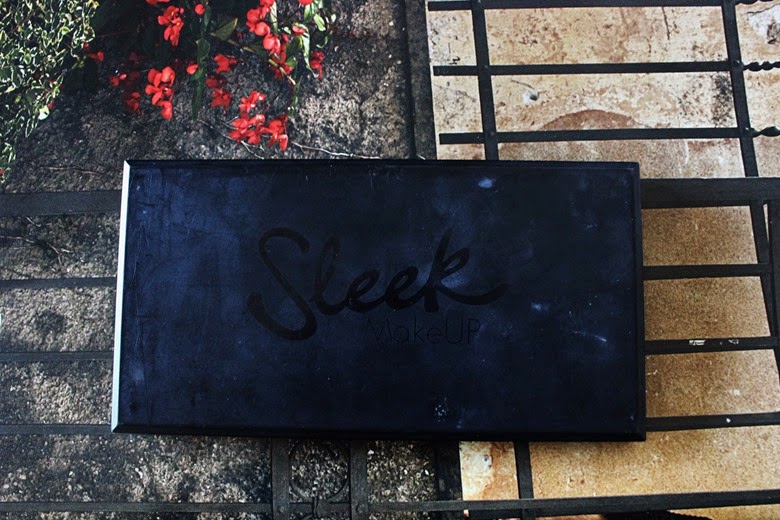
The packaging is the standard Sleek style, with a full mirror in the lid which is always mighty useful when travelling. On the downside the casing of the eyeshadow palette is easy to get grubby (as you can see from above) and even a face wipe had a tough time cleaning it! Each shadow has it’s own name, which is pretty cute but I do wish they had written the names under the shadows, or at least on the back like MUA had the initiative to do, because the plastic sheet that fits inside is very easy to lose.

sleek-oh-so-special-eyeshadow-palette-review-swatches

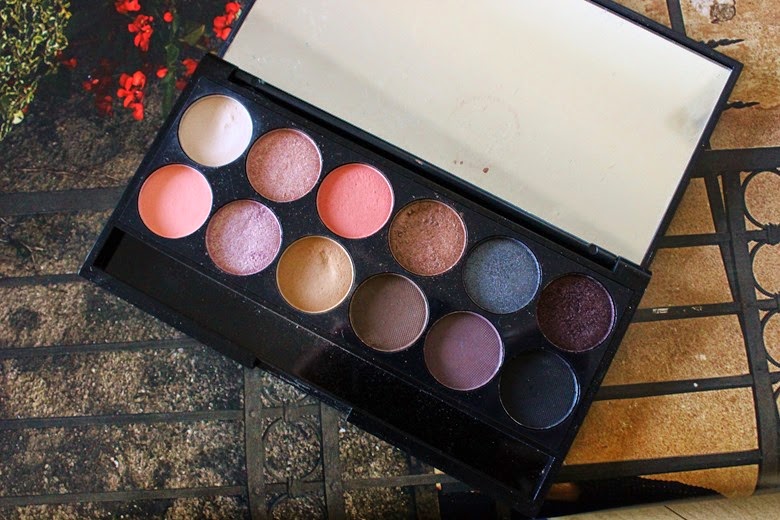
Of the 12 eyeshadows, 7 are matte and 5 are buttery shimmer shades. I’m going to run through each shade and then show more swatches below.

Bow: The perfect bone/off white matte shade, this is my go-to base when I don’t want to do too much with my eyes, but I want to set the concealer (which covers up the darkness on the lid). Its also the perfect brow bone highlight as shimmer under the brow isn’t usually a good look...unless its your prom..or your wedding ya feel? Unfortunately it hasn’t swatched well here at all, but on the lid with a primer it really is my most used shade of the palette.

Organza: A buttery shimmery pink with lots of pigment to it. What I love about this palette is that none of the shimmery shades have any hints of glitter in them. This has a slight silver undertone to it, but its stunning and the pigment really does rival Urban Decay.

Ribbon: Is a matte coral pink shade and I love using this to jazz up a basic neutral eye every now and again. The fact that its matte means it doesn't stand out too much, making it appropriate for the day time. Shimmery pops of colour on the lid are more a night time thing for me personally.

Gift Basket: A beautiful buttery medium brown shade, which would be the perfect base for a smoky eye from this palette!

Glitz: Reminds me of UD’s Gunmetal, its a mix between a blue and a silver and its a nice shade to add if you want to add some definition under the eyes but don’t want to use a black shade.

Celebrate: A stunning deep purple, with insane pigmentation after just one sweep! This shade looks stunning contrasted with Ribbon, and again is fantastic for smoking out any look. I find by adding a little of this into the crease, it’s less harsh than black but still adds sultry definition so well.

Pamper: A stunning light pink, which is again is matte and super pigmented!

Gateau: My least favourite shimmery shade of the palette but not a dud at all. Its very much a silverish-pink, and is a decent inner-corner highlight but that’s about how versatile it is for me.

The Mail: THE PERFECT TRANSITION SHADE EVER I adore this shade! A matte camel-tone, a lot of times I will grab this palette just for this shade because using a transition shade makes eyeshadow looks pull together, and especially for my skin tone I love this!

Boxed: A dark brown matte shade, which I use sooo much! It looks gorgeous with the matte and shimmery pinks, and also 'Gift Basket’. I personally love adding some shadow under the lower lashline and this is my go-to shade normally as its simple but effective in adding some subtle definition!

Wrapped Up: A matte dark taupe colour, which looks stunning with the shade celebrate to create a warmer sultry smoky eye. On the other hand, its perfect used lightly in the crease for a little bit of definition for day time looks as well as night time.

Noir: A satisfyingly pigmented matte black, there’s not a whole lot to say about this aside from its a basic shade that everyone should own - and Sleek’s noir is pretty good.

sleek-oh-so-special-eyeshadow-palette-review-swatches

And that is the review for my favourite Sleek palette right now! It’s one that fabulous for beginners to makeup and eyeshadow, but also valuable to people who have been dabbling about with the stuff for a while.

Which is your favourite Sleek E/S Palette?

Thanks for reading!

 Follow Via Bloglovin' | Tweet Me | Follow on Instagram | Like The Blushing Giraffe on Facebook

Review | Sleek Oh So Special Eyeshadow Palette

sleek-oh-so-special-eyeshadow-palette-review-swatches

Hello lovelies! I was organising my eyeshadow palettes and looking at the insane number of Sleek ones I’ve managed to collect over the past few years, I was bamboozled about why I haven't reviewed any of them yet?! To be really honest with you all, I despise doing swatches but I’m trying my best so I hope they aren’t too bad!)

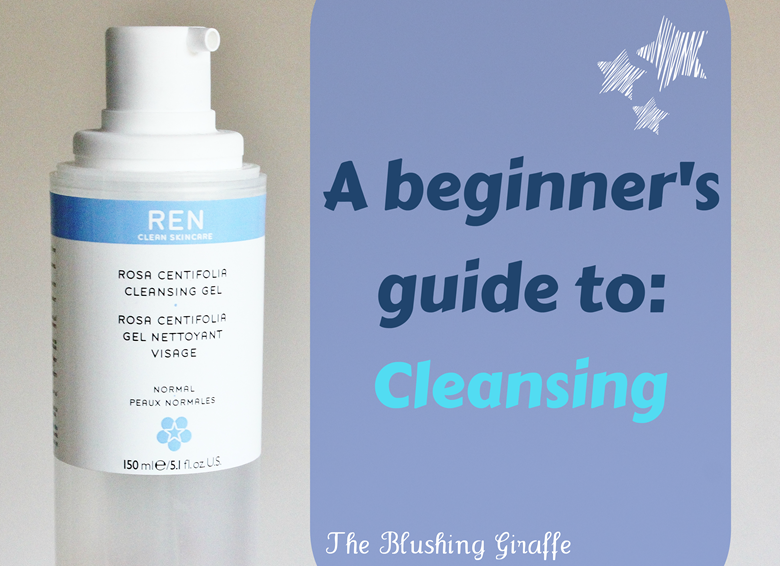
A beginner’s guide to Cleansing

a beginners guide to cleansing

One of the best things about starting a beauty blog for me, has been the drastic change in my skincare routine. Or actually making a skincare routine at all! At the very start of 2014 one of my goals was to make a routine and stick to it – for the most part I have! ^_^ I’ve also done a lot of reading on skin, learning what’s what and what to avoid and I thought it would be useful to dedicate a post to cleansing. This is mainly aimed at people who’ve never thought about skincare before, whether you’re 12 or 20 I hope this is somewhat useful for you!

So generally there is no real rules with makeup BUT skincare does have some DOS and DON’Ts. Let us start with the stuff you should avoid.

DON’Ts

Don’t -Use soap to wash your face:
I don’t know about you, but as a child I was always asked to wash my face and hands with soap – not a good idea! Soap strips the skin of it’s natural oils, which leave it feeling uncomfortably tight and dry. It’s said to be as harsh as using a detergent on your facial skin! (which is the most delicate obviously) and so it’s great for cleaning the body but it does absolutely nothing to protect the body. Bottom line – soap isn’t suitable for facial use.


Don’t - Purchase a Cleanser that contains Parabens
I’m not going to pretend I’m all clued up on chemicals and preservatives and that everything I use on my skin is chemical free – not true (and technically almost impossible). However I do try and steer clear of parabens within my skincare. What exactly are parabens? They are preservatives that prolong the shelf limit of cosmetics, skincare, shampoos etc.; Ok so here is the thing, there is a lot of anguish and hatred towards these parabens, however I have found an interesting article on this all being a MYTH or at least somewhat exaggerated by the media: read it here. For this reason, I don’t mind using makeup that contains parabens because makeup is put on the face, and later thoroughly removed. It is not permanent or rubbed in, and if you imagine the TINY proportion of parabens per ‘pump’ or ‘sweep of an eyeshadow’ you can understand why I don’t really think of them as being dangerous or harmful to the skin.

However some people believe that Parabens can be a cause for cancerous tumours, whereas the FDA have approved them to be safe thus far. Lets just say this will be a always be a debate and some people choose to go all natural in everything, others like myself take it with a pinch of salt. That being said I do prefer to buy skincare that contains as little chemicals as possible because with moisturisers and lotions you’re rubbing them into the skin and the less chemicals rubbed in the better. So in short, it’s probably better to purchase a cleanser that is paraben free, or from a brand that strictly regulates the amount of parabens used. Some of my favourites include REN Skincare,LUSH and a new one: Green People Organic Lifestyle Gentle Cleanse & Make-up Remover* which I took with me on a weekend away and was thoroughly impressed with how well it dissolved the make-up from my skin and left it feeling very clean and equally as soft.


Don’t - Over-cleanse

It can be quite easy to become slightly obsessed with removing all dirt and grime from the face if you start reading about the types of bacteria our skin encounters on a daily basis! However over-cleansing is the biggest cause of sensitive skin as it completely strips the skin’s underlayers of its natural protective properties – so yeah cleansing is important but try not to over-do it!


OK now enough of the don’ts, lets get to what you SHOULD be doing!


DO’S OF CLEANSING 


Do - Determine your skin type
Make sure you know which category your skin lies in. Is it oily, normal, sensitive, dry or combination? If you understand what skin-type you have, you can look into products that will be best suited to you. Since starting and sticking to a skincare routine my skin which was more on the dry side has become normal-dry which just goes to show giving you face some tlc can really pay off! Also if you know your skintype you can select a cleanser that will work well (gel cleansers are best to void if you have dry skin as they do tend to leave the skin feeling tight, on the other hand oil and balm cleansers can be amazing because even when you’ve washed your face, your skin is left soft and feeling nourished.
This website here is a fantastic tool to help you with determining your skin type if you’re unsure!


Do - Stick to water soluble cleansers
Micellar cleaning waters have taken the world by storm, and yes they are pretty awesome for removing makeup gently and effectively. However they should always be used as part of a double cleanse, with your second cleanser being a facial wash or other type of cleanser that involves giving you face a good wash and getting rid of all remaining dirt, makeup and micellar solution.


Do - Exfoliate at least once a week
Everyday we ‘shed’ skin cells and the build up of these can cause clogged pores, which in turn can lead to breakouts and other blemishes. If you have dry skin, weekly exfoliation will help to smooth out the skin and reduce dry patches. You can buy exfoliating scrubs for a couple of quid, and as long as they aren't too harsh and you are massaging it into the skin GENTLY you will notice a great difference from the first exfoliation. I used to use St Ives peaches very often, but over time I found it because a bit too harsh for my skin, so then I switched to clean and clear which has smaller granules and I was very impressed with how soft my face felt afterwards! Not to mention how squeaky clean it looked too!

Those are just a few pointed that I think EVERYONE should know, and try to follow through. Whether you wear makeup everyday, once a week or once in a blue moon – skincare is always worth taking the time out to do – and if you make it into a routine, by cleansing your skin properly you could notice a real difference :)


Thanks for reading!

A beginner’s guide to Cleansing

a beginners guide to cleansing

One of the best things about starting a beauty blog for me, has been the drastic change in my skincare routine. Or actually making a skincare routine at all! At the very start of 2014 one of my goals was to make a routine and stick to it – for the most part I have! ^_^ I’ve also done a lot of reading on skin, learning what’s what and what to avoid and I thought it would be useful to dedicate a post to cleansing. This is mainly aimed at people who’ve never thought about skincare before, whether you’re 12 or 20 I hope this is somewhat useful for you!

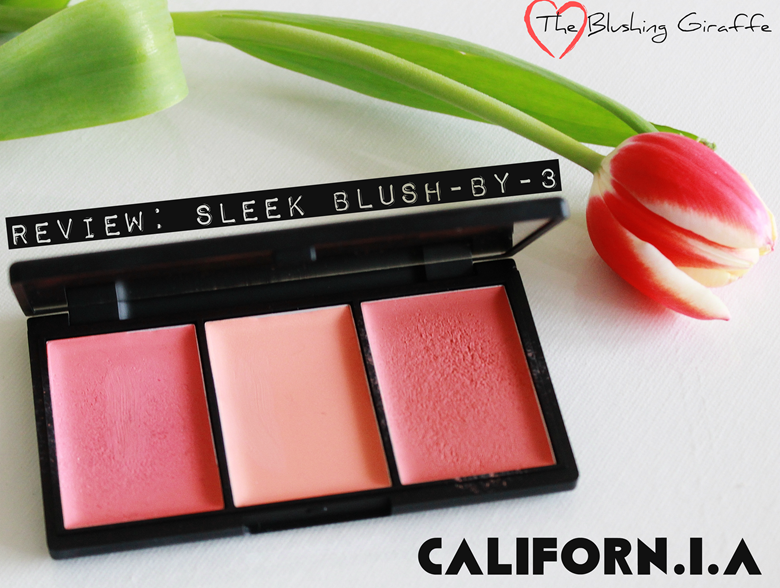
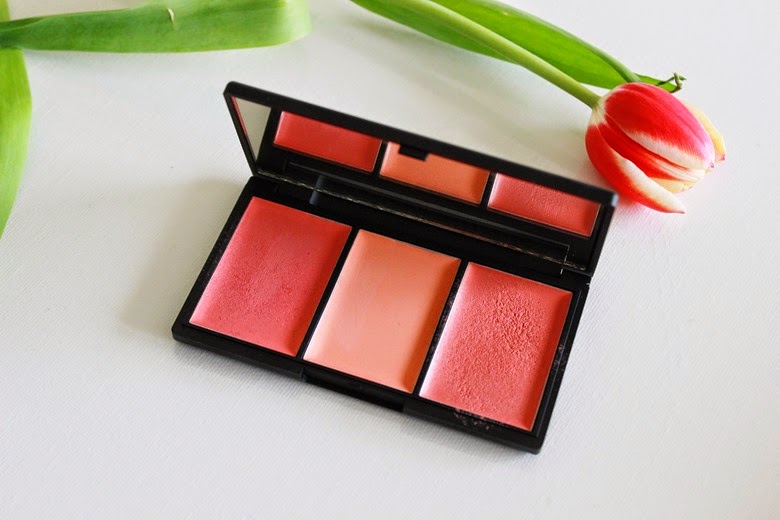
Review | Sleek Blush by 3 in CALIFORN.I.A

sleek-blush-by-3-california-cream-blush-review-swatch

Oh sleek. How I adore thee. One of my favourite drugstore brands without a doubt, they never fail to deliver when it comes to the cheeks. I purchased this blush palette a while ago, but I’ve only got around to playing with it recently as I’ve not been the biggest cream blush fan –too much pigment and always too thick//too runny in my experience... That is until now!
sleek-blush-by-3-california-cream-blush-review-swatch

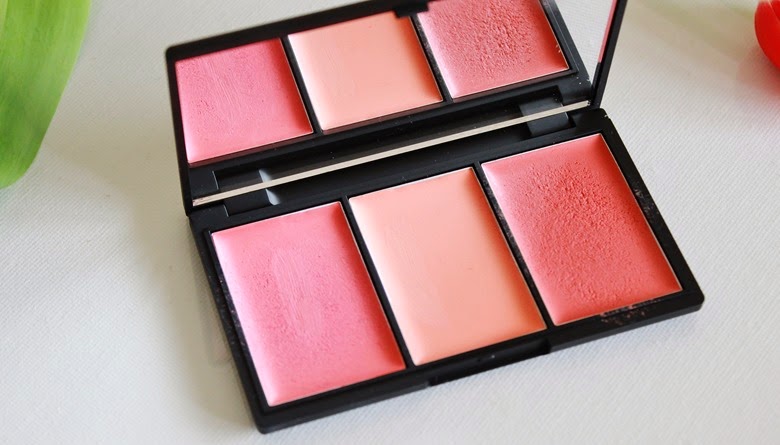
The CALIFORN.I.A palette is the singular blush by 3 that contains only cream blushers. They cost £9.99 (superdrug) which is a bargain considering you get 3 blushers and it works out at costing you £3.33 each! wow. The total weight is 13g so you have around 4g of each blush, again making it very very reasonable! The formula is wonderfully soft and creamy without being too squishy or too liquidish which was always something that put me off about cream blush before this. It is a happy medium, so well done Sleek - formula is on point.

sleek-blush-by-3-california-cream-blush-review-swatch

The finish is what both surprised and pleased me, as it looks very natural and effortless but without being over the top dewy/shiny. It dries down to a stain like finish which not only enhances the longevity but also contributes to the blush looking au natural. I love how easy it is to apply with your fingers! As you might be able to see I did try and apply it with an ebay stippling brush and the amount of pigment it picked up scared me off totally. However with the fingers, if you dab a little onto the cheeks you have total control over the amount of colour being distributed –  which is so important when it comes to blush!

You can use these as a light wash of colour, or build it up a little more for a pop. Also cream blush works wonderfully for dry skin tones as it doesn't accentuate dry patches, nor does it look powdery.

sleek-blush-by-3-california-cream-blush-review-swatch

The packaging is the standard black sleek and sturdy rectangle, with a handy full sized mirror on the inside lid. This size packaging is really handy for travelling as you can clearly see your whole face within the mirror and it’s light enough to hold up while you do your eyes, cheeks etc. I ALWAYS have a blush palette or the face form kit with me when I’m staying away anywhere. The shade names are written on the back clearly.

sleek-blush-by-3-california-cream-blush-review-swatch
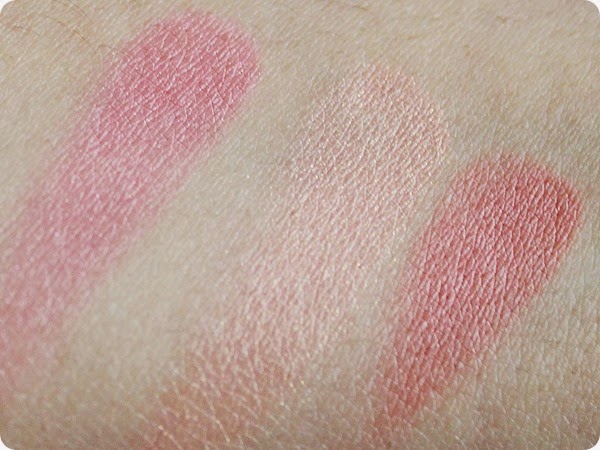
L-R: OC, The Surf and Newport Peach

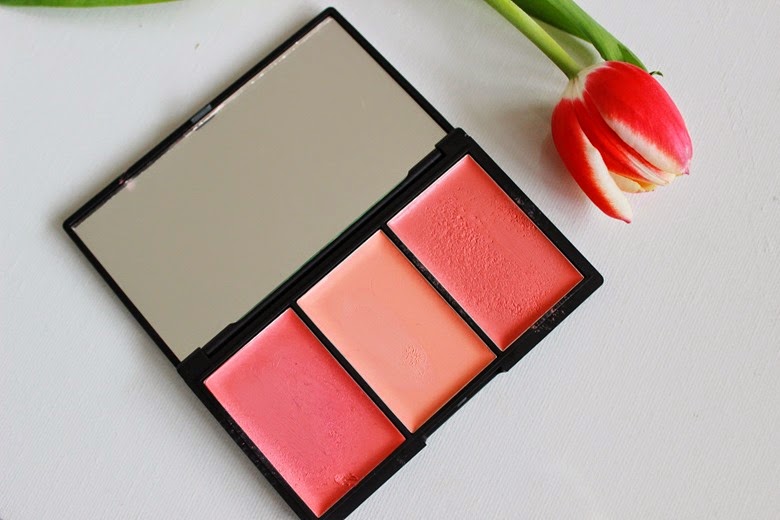
As the name might suggest, this is most definitely a summer palette. The shades are as follows:

OC: The pinkest toned coral I own. This shade looks absolutely stunning on anyone who is around NC30 plus, or with olive skintones/a tan because boy oh boy does it compliment us well! I think pinks can be tricky when you have a warmer skintone as sometimes they clash quite drastically with the amount of warmth in our skintone - and it can be enough to put people off pinks.  But this one is different – as long as you start off gently and add more if you feel necessary. The balance between cool and warmth in the pink, and also the ability to sheer it would is just wonderful.

The Surf: A light peach shade with golden shimmer. On my skintone this doesn’t show up the greatest and is my least used shade. However I do like layering this up with Newport Peach because they compliment each other beautiful and the slight shimmer gives a bronzy/summer makeup look that extra pizazz. This would look gorgeous on lighter skintones, and it would make a stunning, yet subtle, cream highlighter for deeper skintones.

Newport Peach: My favourite shade of the trio, this is a failproof true coral which leans ever so slightly more on the orange side. Again a shade that would be flattering for all skintones, I love how this looks applied just over the contour line, it gives a stunning sculpting effect whilst still adding colour to the cheeks (a different way of applying blush if you’re bored of your usual swirling on the apples of the cheeks!)


Final Verdict:
Product rating: 9
Pros: It’s the perfect summer cheek palette and great for beginners with cream blush too! The formula is perfect, they’re easy to apply with fingers and you can layer them up without fuss, you can get a very natural looking flush of colour that lasts a decent amount of time!
Cons: The Surf isn’t the most versatile colour for medium skintones.
Repurchase? When I finally do finish it off I probably will because the shades,formula and price of this palette are so on point! 

Related post: Review of the Sleek blush by 3 in Pumpkin can be found here.


Thanks for reading!


Review | Sleek Blush by 3 in CALIFORN.I.A

sleek-blush-by-3-california-cream-blush-review-swatch

Oh sleek. How I adore thee. One of my favourite drugstore brands without a doubt, they never fail to deliver when it comes to the cheeks. I purchased this blush palette a while ago, but I’ve only got around to playing with it recently as I’ve not been the biggest cream blush fan –too much pigment and always too thick//too runny in my experience... That is until now!

Requested | How I Cover Up Really Dark Under-eye Circles


Hello everybody! This is one of my most asked about posts, and it’s taken me a long while to finally write it up! I think its probably because I’m worried that the products I recommend won’t work for everyone, so I’ve decided to make it into a bit of a ‘guide to covering up dark circles’ and I’ll explain everything as thoroughly as possible while recommending other products too. (Read: this will be a long one! In fact one of the longest I have written to date ._.)

This post will only really benefit you if you have medium/very dark under eye-circles. Of course please feel free to read if anyways if you don’t, I’m  just throwing it out there! If you have no dark circles/only very slightly then you don’t need to be using all of these products you lucky thing!
 My skintone is around NC30-35 and I have very dark circles. They are partly hereditary and partly because of late nights. The trouble with dark circles it that they impossible to eradicate completely. There are a few things you can try which sometimes do help lighten them, but usually (and unfortunately) they don’t do much. For example placing a thin slice of cucumber, or potatoes on the eyes is said to reduce the darkness, and although it feels very cooling and refreshing there is little evidence that it rids you of darkness. Also Increasing your intake of water is also supposed to help, something we should do anyways because water is EVERYTHING but again it’s probably not going to make a HUGE difference to your under-eyes. A lot of the time people buy fancy expensive eye-creams which promise to rid them of dark circles and…they just don’t work! So that brings us to makeup!

Like I said I do have pretty dark circles, so if you don’t – this will be excessive for you!
My four step routine is as follows:

Moisturise – Correct – Conceal – Set

1. Moisturise using a lightweight, hydrating eye-cream
Why? I know I just dismissed eye-creams a couple of sentences above, but I was talking about those rather expensive ‘talk the talk but don’t walk the walk’ kinda creams y’know? For me it is essential that I use an eye-cream before I start my concealing routine, because my day cream (the Nuxe Reve de Meil Ultra Comfortable Face Cream) is simply too thick and creamy for the delicate under-eye area.

You want to hydrate the area and prepare the area for some pretty thick products or at least 2 or more light layers of makeup! So the moisturising is best done with an eye-cream and there are plenty available on from the drugstore/supermarkets so you don’t have to purchase an over-priced one. If you don’t moisturise your skin and you have any dryness around your eye – you will definitely see concealer cake up and look horrendous ._. so take the time to prep the skin properly!

Currently I have been loving the ‘Good things Bright Eyes Eye Cream’ which is fragrance free as well as paraben and mineral oil free too. The only thing I don’t love about it is it’s claim to reduce dark circles, because it hasn’t for me! But still a good EC!

How do I use it? I simply dot it around the eye area and using my ring finger gently ‘tap’ it in. It’s SO important to be gentle with your under-eye area and vigorously rubbing around the eyes is a major no-no. Also by using a tapping motion you’re more likely to use less product and evenly distribute the amount you do have on places you need to most.


2. CORRECT The Darkness!

What is it? This is the part which most people skip out on, and then wonder why even with concealer there’s a grey undertone showing through. Dark under-eye circles are essentially dark pigments in the skin. Before we can conceal the skin under the eyes and attempt to brighten it up, we must get that skin to a similar colour to the rest of our face…by colour correcting the darkness!

If you have black/darker under-eye circles then you need a peach shade corrector and if you have blue/green dark circles you need a salmon shade corrector.

 A corrector’s purpose is (funnily enough) to correct and it is the first thing that a makeup artist will do when working on the client. By targeting the area’s on the face that need the most attention and spending a bit more time and effort on it, you are free to then use a light/medium base which gives you a natural look rather than a super heavy full coverage foundation which could result in cake face! (e.g of a beautiful dewy base -Bare Minerals bareskin - reviewed here).

So…correcting = essential for anyone with dark under-eye circles!

How do I use it?

Currently I am using Benefit’s Erase Paste in the shade 3 ‘deep’. I use the Real Technique’s detailer brush (from the Core Collection) and take a small amount out of the tub. Then I  brush the corrector in the inner corner and outer corner around my eye. These are the darkest areas. I always make sure I brush corrector in a C shape, ensuring that darkness is covered above eye level and under the eye also (refer to photo below if confused).


Essentially apply the corrector in the darkest areas around the eye, but don’t over-do it. Correctors are usually made of a thicker consistency than a concealer, so you need to use a small amount and then blend it out with your ring finger. The warmth of your finger will help blend the corrector around your eyes and cover more area without applying LOTS of product. Trying to use a brush to blend out corrector is not going to get you very far because of how thick it is!

In this slightly  comical picture, I have shown where I apply the corrector with the detailer brush. Once it is on I use my ring finger to gently blend it out using the patting motion which spreads out the corrector and allows it’s coverage to spread without applying too much of the creamy stuff!


What correctors are out there?
The disadvantage of correcting is that the drugstore hasn’t really clicked onto it yet. So a lot of the time correctors are expensive, but remember you are only using a small amount (no-where near as much as a brightening/highlighting concealer) and generally a little goes a long way.

The most famous corrector is probably the Bobbi Brown one, however as that is owned by Estee Lauder who support Israel, thus killing lots of innocent babies and women I won't be purchasing from them the brands they own ever again. 

 Another option I used to use was the Benefit Boi-ing concealer in the shade 3, which is orange in tone and a slightly thick/stubborn formula! So I found it much easier to use my fingers to gently apply some of it, however if I bought it again I would warm the concealer up IN the pan,and then use a brush.

The detailer brush has made correcting my dark circles SO much easier because it is flat, small and applies the product exactly where you need it. I also find it easy to add more without disturbing what is underneath (something which is easy to do when you are using your fingers).

Currently the Benefit Erase Paste in the shade 3 is working a treat because it is designed for under eyes and so it’s a tad more creamy than products which are labelled as correctors. Having said that if you use a liquid concealer which is darker in colour, it simply won’t offer as much coverage and you’ll be there for hours layering it up – not to mention your eyes will end up looking an orange mess! Anything liquid-ish for correcting is not going to be effective enough. In fact Goss Wayne even recommends you to use a lipstick if it’s the right shade to correct your dark circles, and we all know how creamy they can be!

So a slightly creamy, thick in texture corrector is essential and a small detailer brush is the best for applying a concentrated amount of corrector onto the darkness.


3. Conceal and brighten to your heart’s content

This is the part which everyone is fairly familiar with so I will keep it as brief as possible!

Why do it?
So once you have corrected your dark circles, you will find that your under-eye now looks the same or slightly orange/peachier than the rest of your skintone. Some people are lucky in that their dark circles aren’t too bad and so they can correct and conceal in one! (Actually the Erase Paste is a ‘brightening camouflage’ and I think if you have medium dark circles and one of the shades matches you, it could be all you need!). However for most people they want a brighter under-eye, and using a concealer (which is a shade or two lighter than your skintone) will be able to brighten and conceal the area too.

How do I do it?

The number one mistake people make (myself included) is applying too much concealer. The most important thing to remember is NOT to add a tiny line directly under the eye, but to apply a small V shape under the eye. I’m not talking about going all out Kim K highlighting (unless you like to do that of course) but a small V shape will help brighten up the whole under-eye area.

Dot or gently spread the concealer from the inner corner in a diagonal line and the connect it to the outer corner. The using a damp sponge OR your ring finger again, bounce and tap around the eye area to brighten it up! (Sort of demonstrated in the picture below!)


Which concealer is best for me?
I get asked this a lot and to be honest it’s a very hard one to answer for someone else! You need to assess this yourself and I’m afraid sometimes its a case of trial and error! What works for me may not for you, so try and think about what YOU need…is it extra coverage? Brightening? and then set about looking for your near perfect concealer.

Personally I stick to my all time favourite drugstore concealer the ‘Collection lasting perfection’ in shade three. This is such a raved about concealer and that is because it provides fantastic coverage. Most people like to use this for blemishes and find it too thick for under the eyes, however as I keep saying I have pretty dark under eye circles, so as long as I am using a small amount and blending it out well with my finger -  I find its coverage fantastic. I also think that its slightly thicker consistency helps it to adhere to the corrector and NOT disturb/move it around! Which is something that happens when I use my Rimmel wake me up concealer because it is quite runny in consistency. 

On the other hand..after correcting you may find that the darkness is rid and you just want to brighten the area up, in which case look for a illuminating concealer. There are many brands who make these (I’ve heard the collection one is great actually!).


4. SET IT ALL!
WHY? There are two reasons – firstly setting it will reduce the amount of creasing and secondly it will prolong the corrector and concealer and keep it in place all day!


What I use and how
I use the Ben Nye Banana Powder which I have reviewed here. I love using this rather than a transparent powder as the yellow colour not only brightens the whole area but also adds a tad more coverage – which is always welcome for people who have very dark circles. You can see this in the instagram video I will post ^_^

Taking the Real Techniques setting brush, I pat it gently in  small amount of the powder and gentle pat it on top of the concealed area. It is ESSENTIAL not to pat TOO much because you will have cakey under-eyes not a good look in the slightest. If you are not of a NC30-NC50 (approx) with yellow undertones then look for a powder similar to your skintone or a translucent one. If you have pink undertones, and are fair I’ve heard the bourjois powder (in the cute quaint pot) is a great brightening powder.

And there you have it ladies! My full concealer routine, nothing revolutionary but I’ve been asked to write this so many times I couldn’t put it off any longer haha ^_^

On my instagram @theblushinggiraffe you can see a super quick video of me completing the routine. If you have any questions please don’t hesitate to drop me a comment and I really hope this has been helpful for you!

Thanks for reading!